 Since last year’s Movember campaign, Devious Diesel from Thomas the Tank Engine and friends had become the fleet’s only non-steam locomotive, but it is now joined by a BR class08 classmate, albeit a more detailed main-range Bachmann version. Not wanting to spend too much, I picked up this model secondhand. Although Bachmann’s modern class 08 models are DCC Ready, the older (and cheaper secondhand) versions are not. Undaunted and wanting an excuse to give the soldering iron some use I purchased 13029, the subject of this guide. This guide will hopefully help anyone out there who is upgrading their layout to DCC and need to convert their older Bachmann class 08 models to DCC, or for those like me are current DCC users on the look-out for the odd bargain diesel shunter!
Note – Step A can also be used as a means to access the motor for adding a tiny drop of oil to the gears.
Step A – Chassis/Body disassembly.
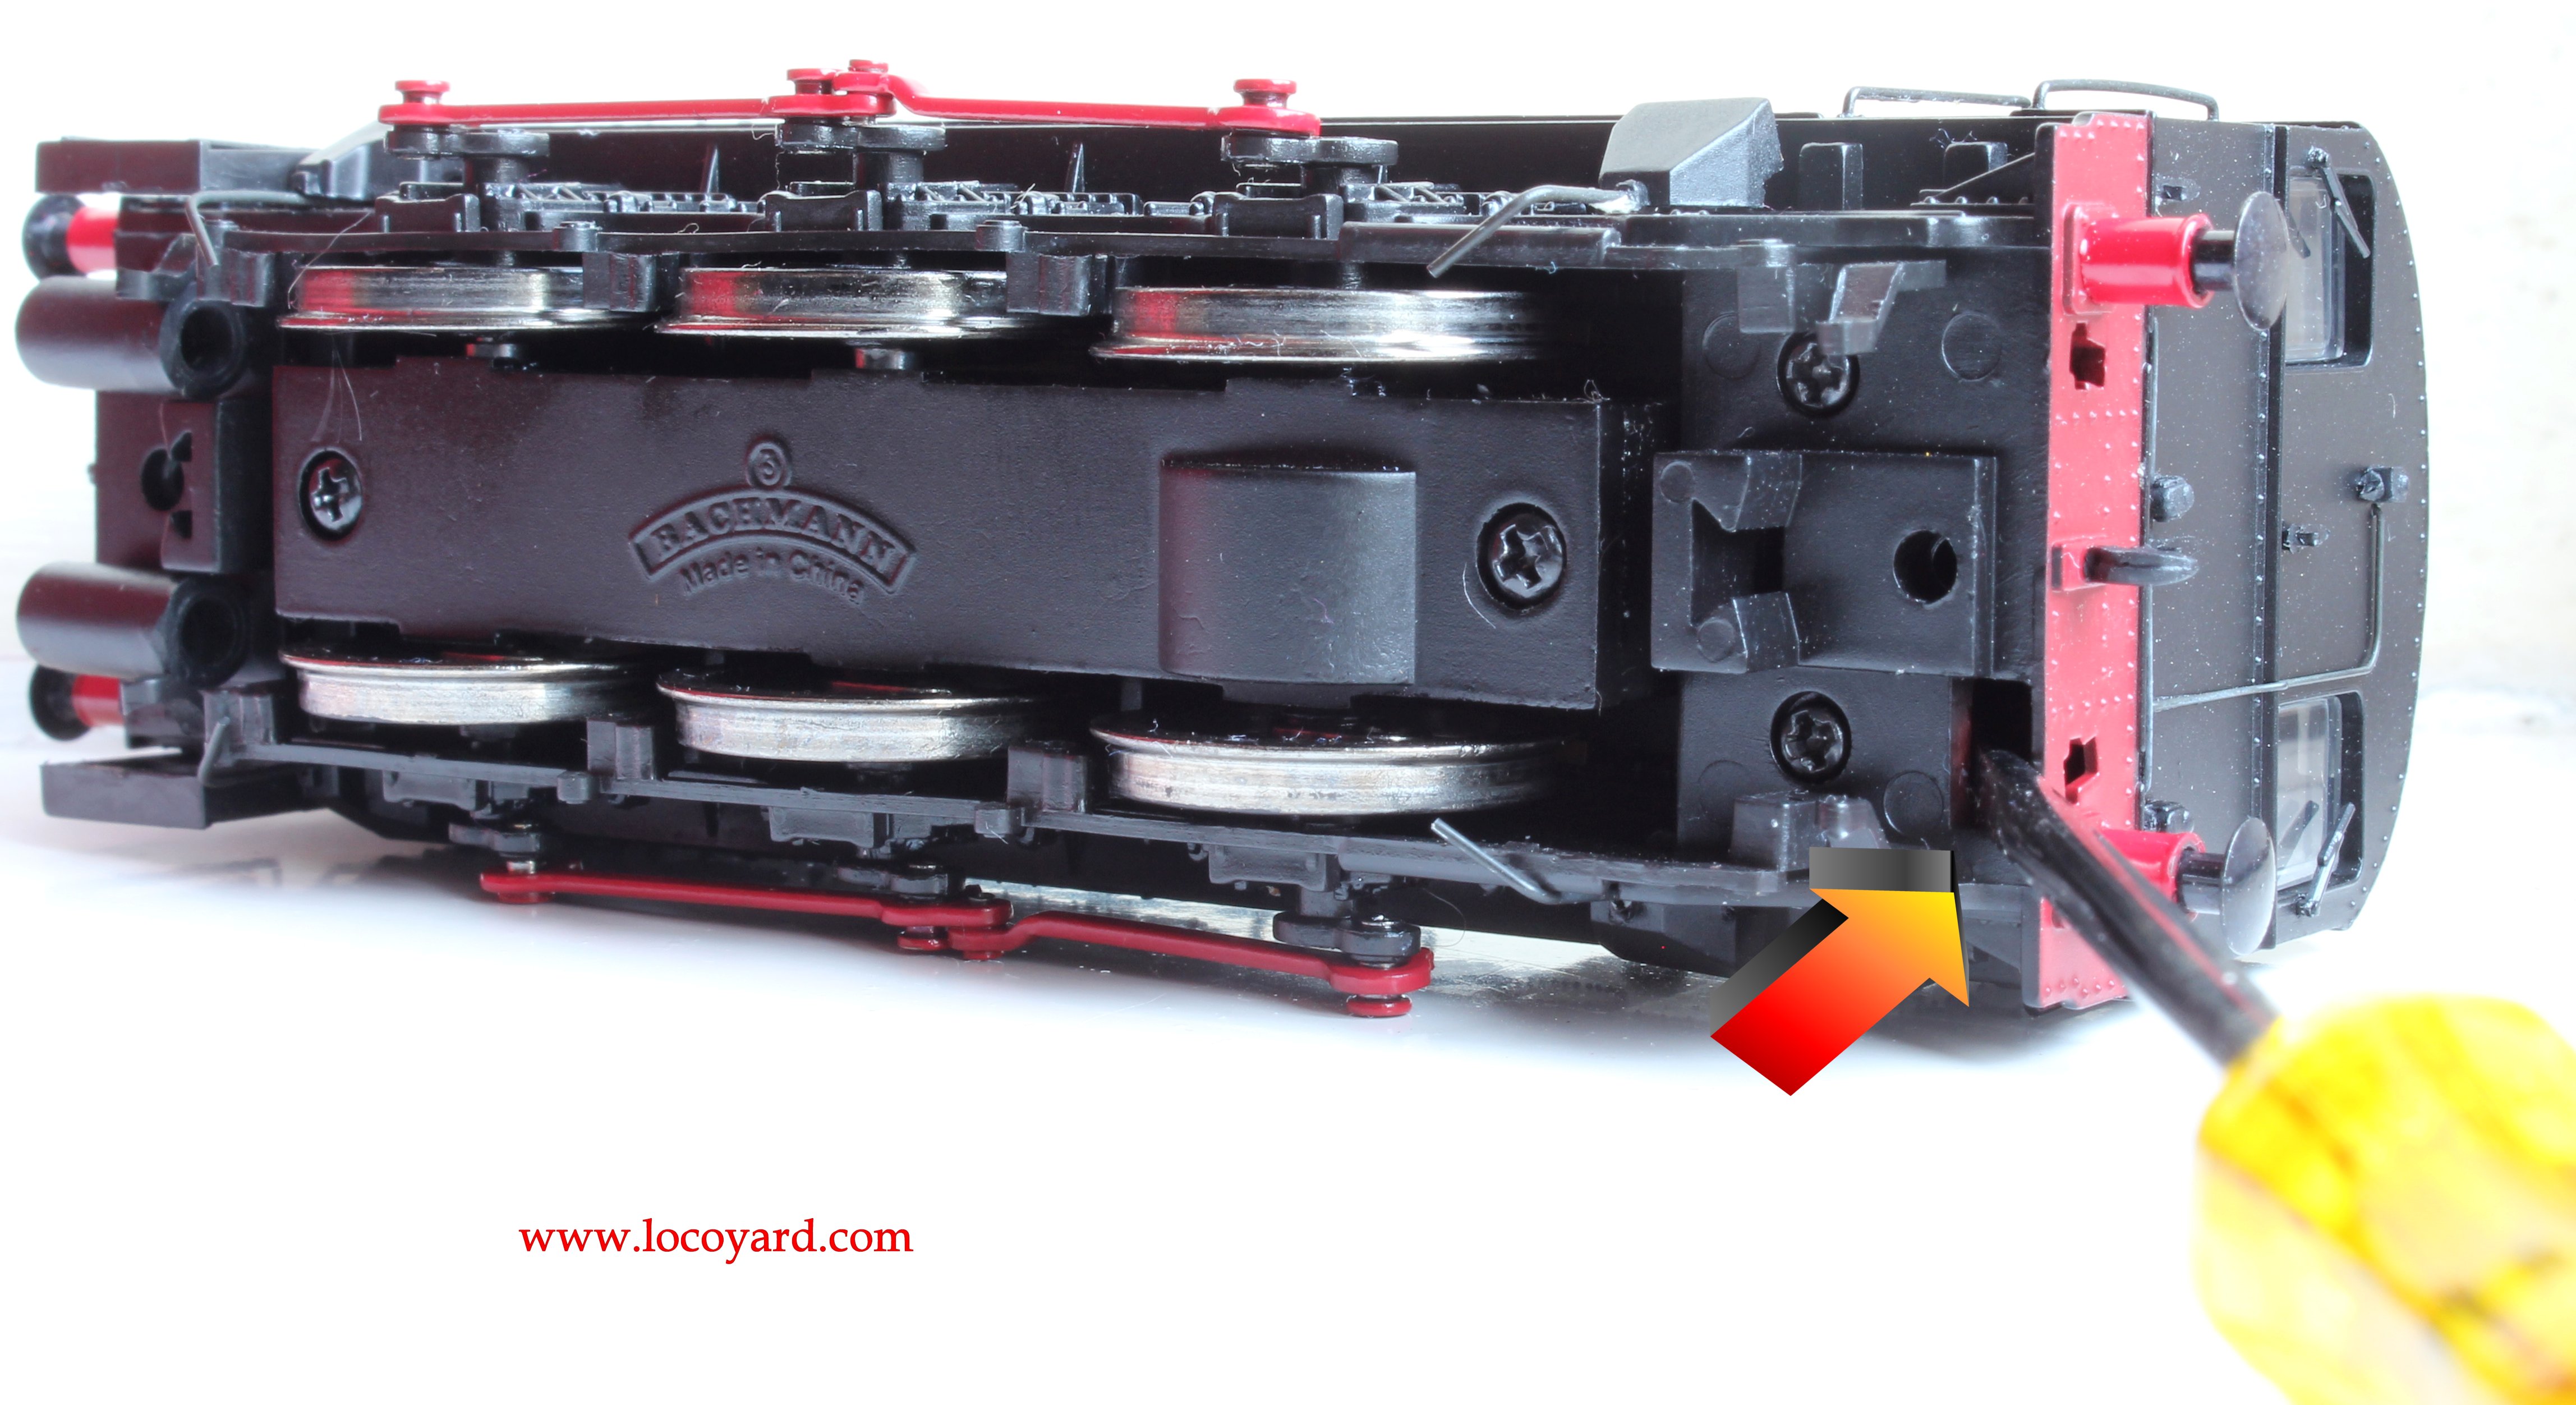
Remove the NEM coupling hooks gently with a flat screwdriver and then unscrew two screws underneath the model as indicated below:
 You will now need to unclip the body from the chassis. Warning – just unclip, do not pull the body away from the chassis yet! Unclip by using a screwdriver to lever it. Put a flat screwdriver in the hole found underneath the chassis at the back of the model and unclip gently, as below.
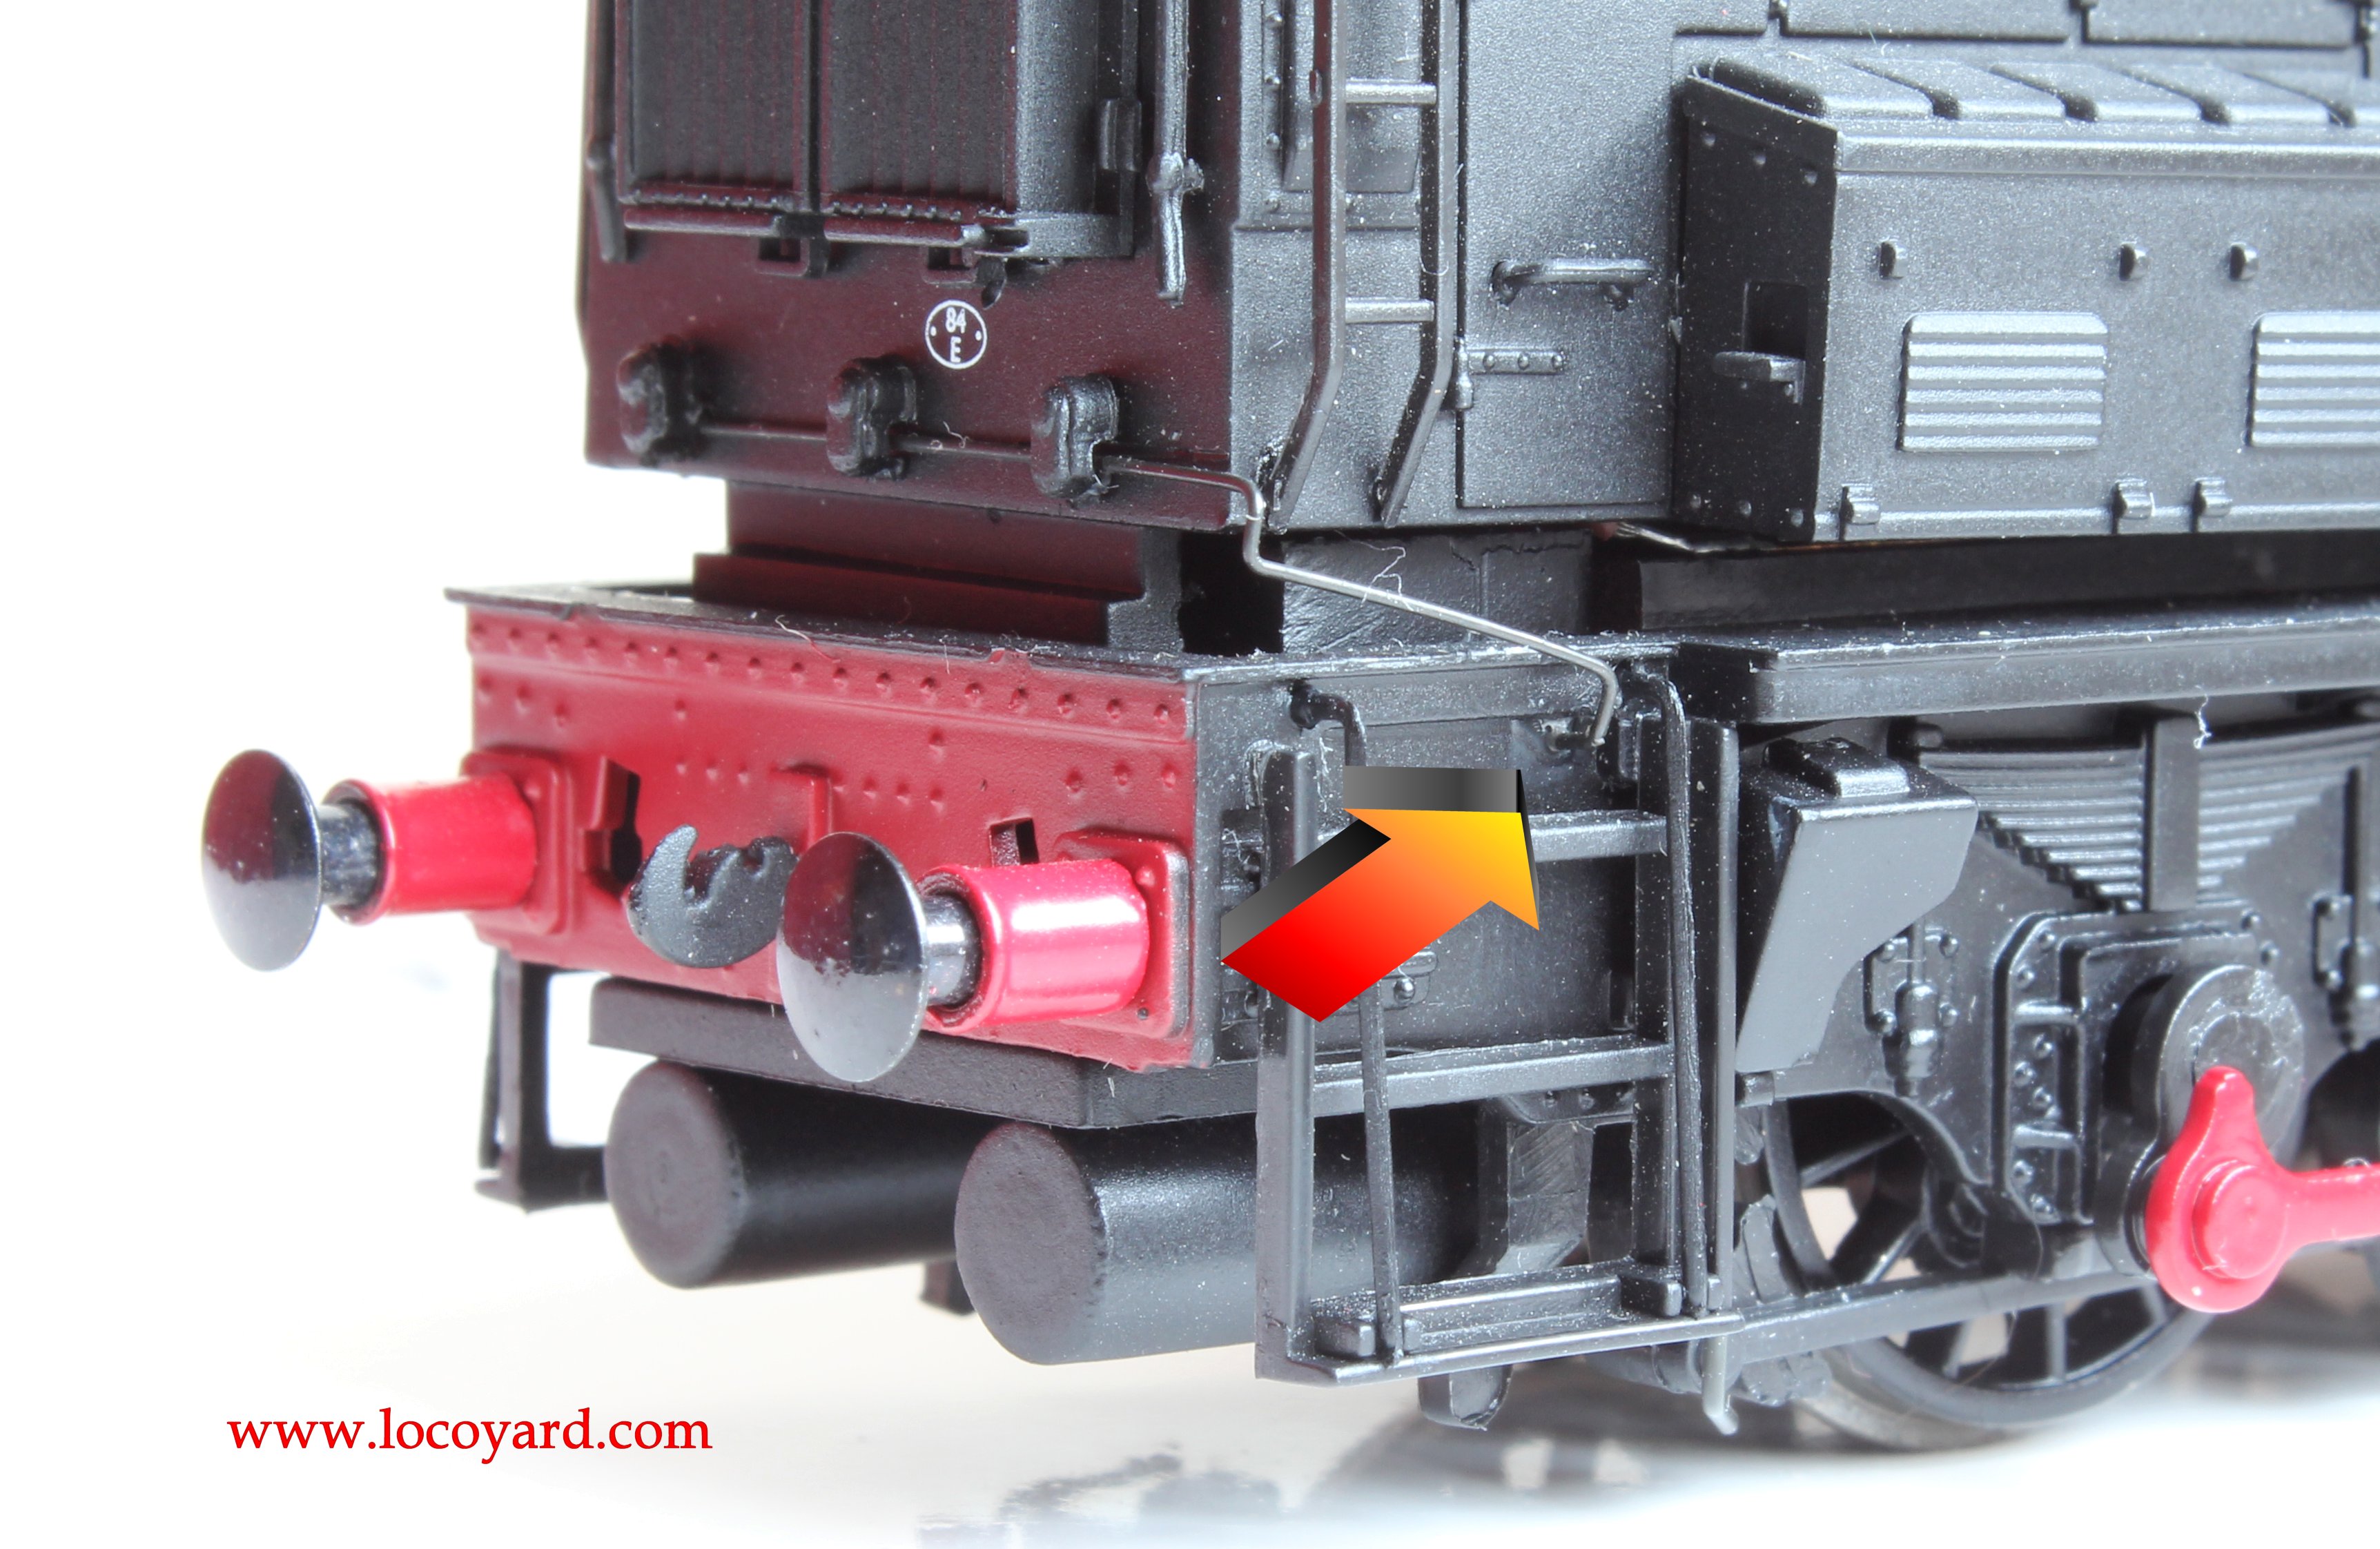
 Now a wire (the lighting conduit, I believe) needs to be pulled out of the chassis.
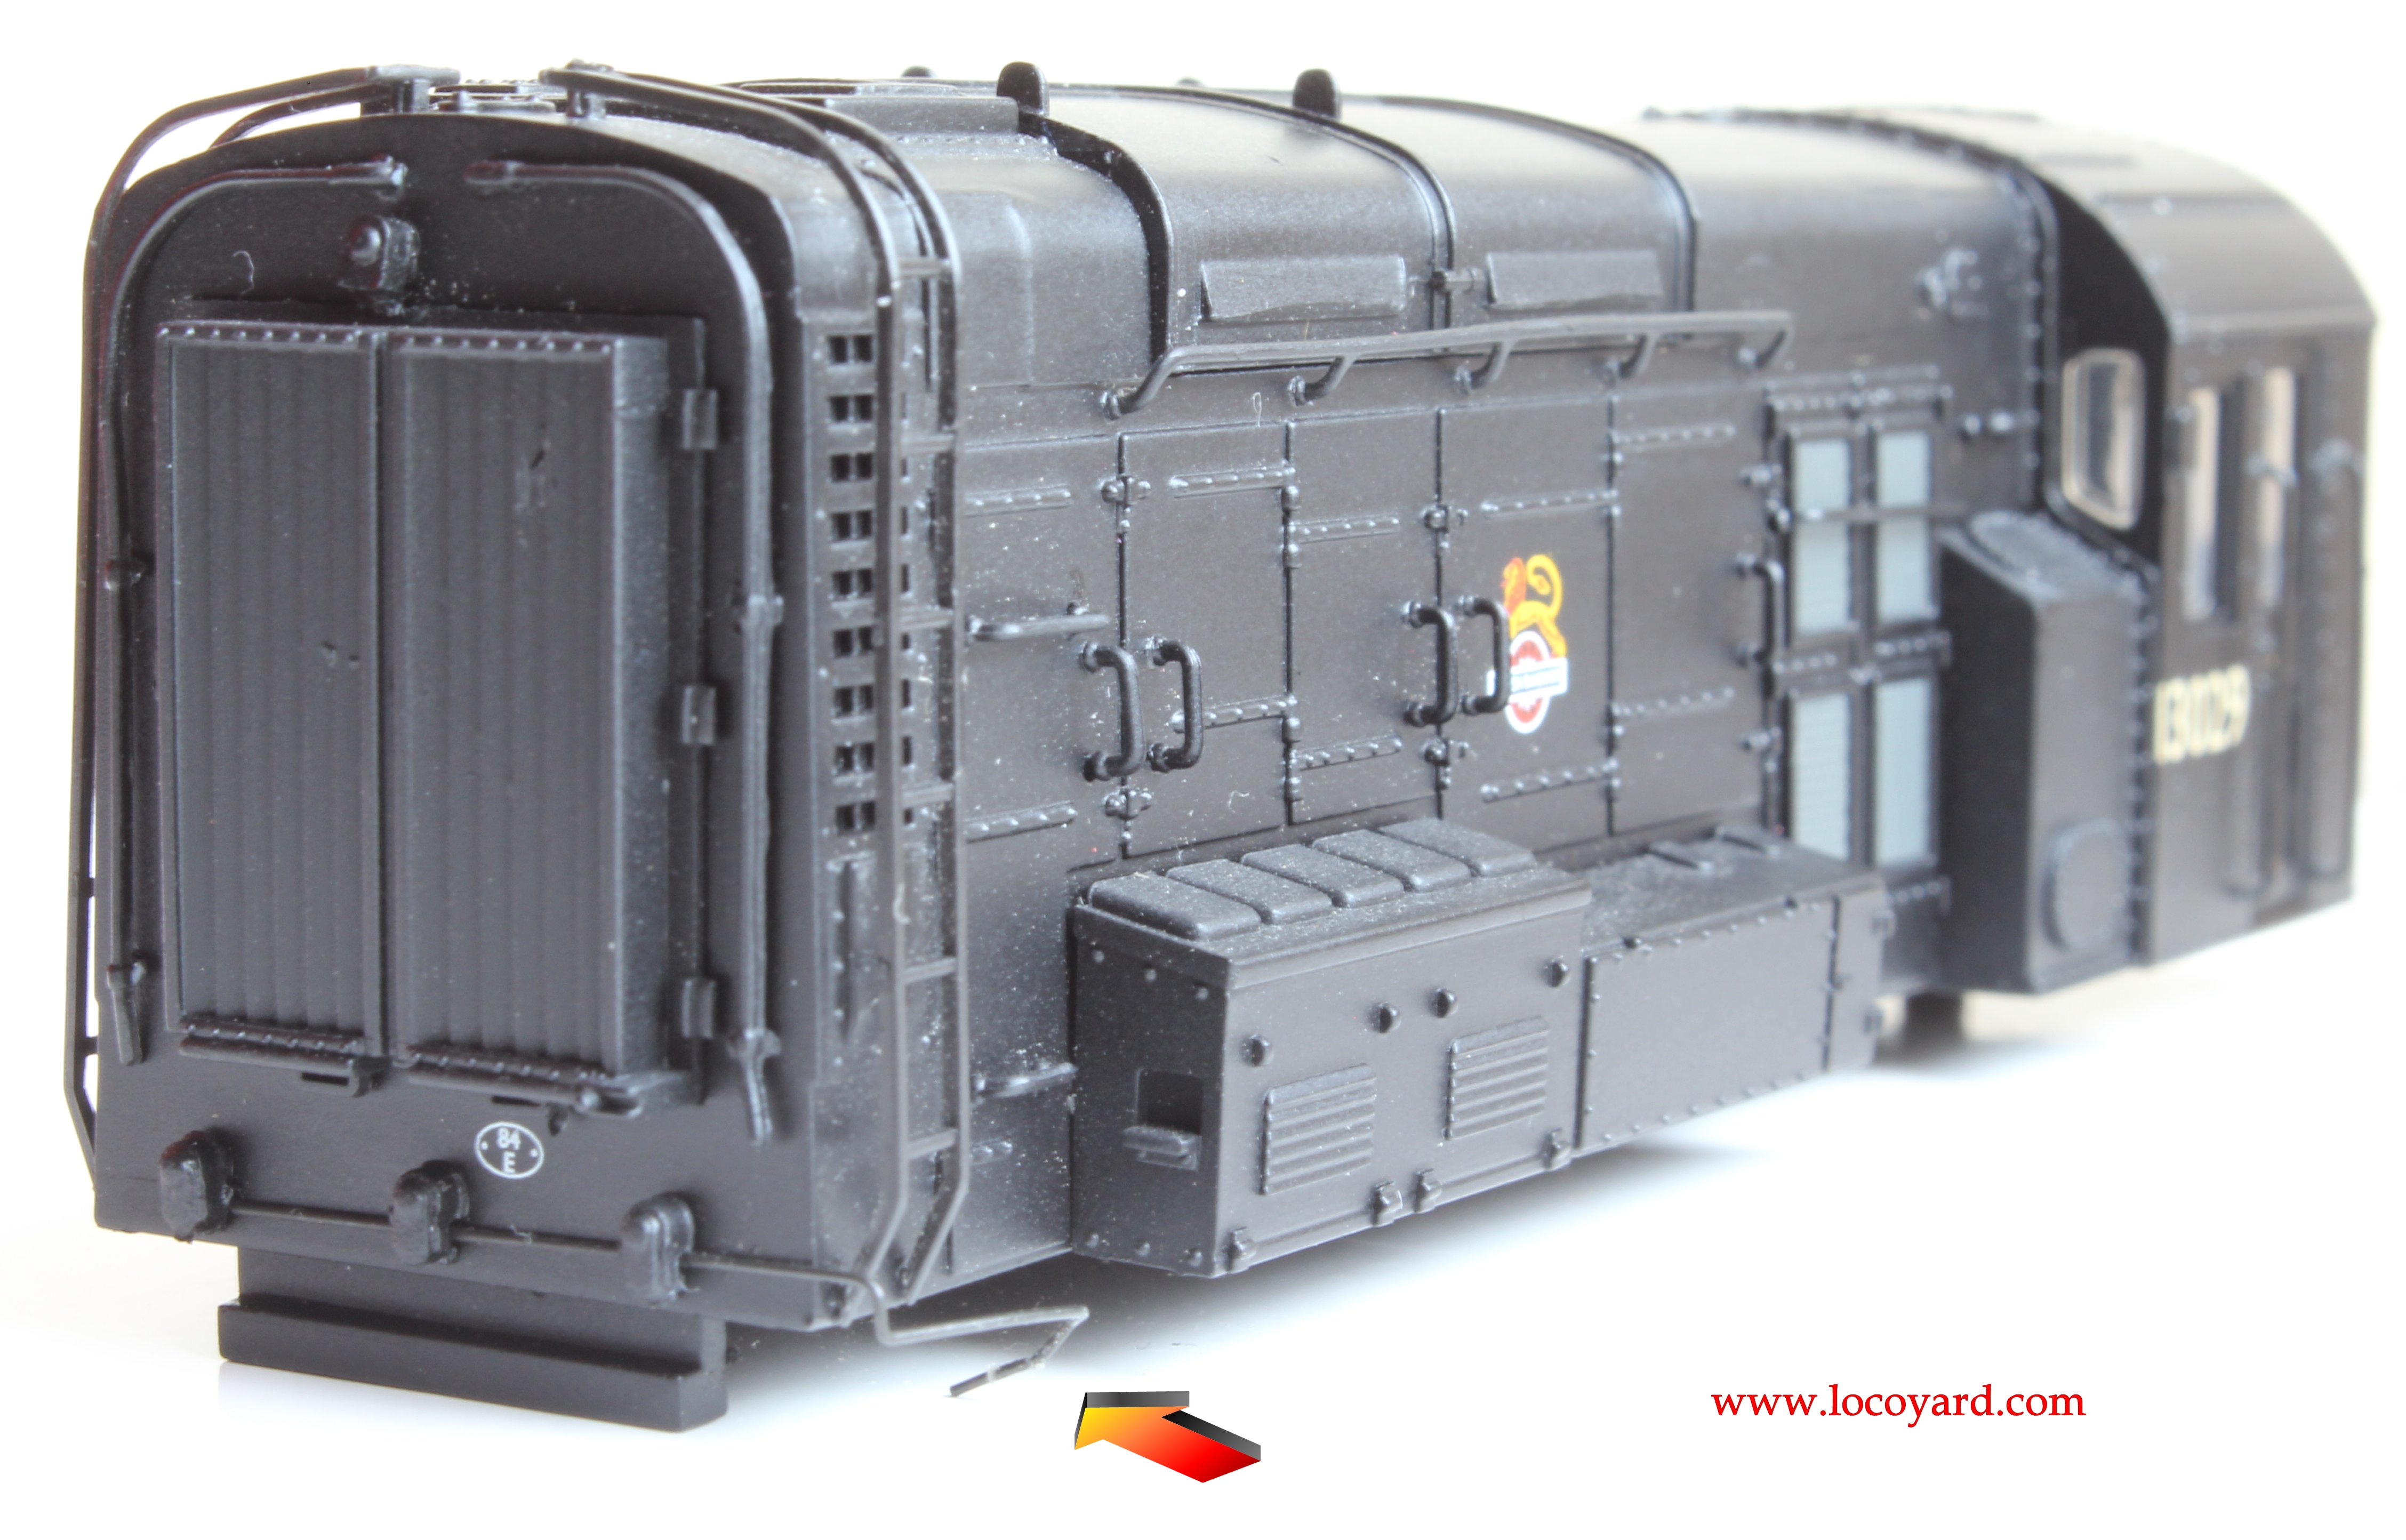
 With this done the body is now removed from the chassis.
 Step B – Removal of the circuit board and attached wires.
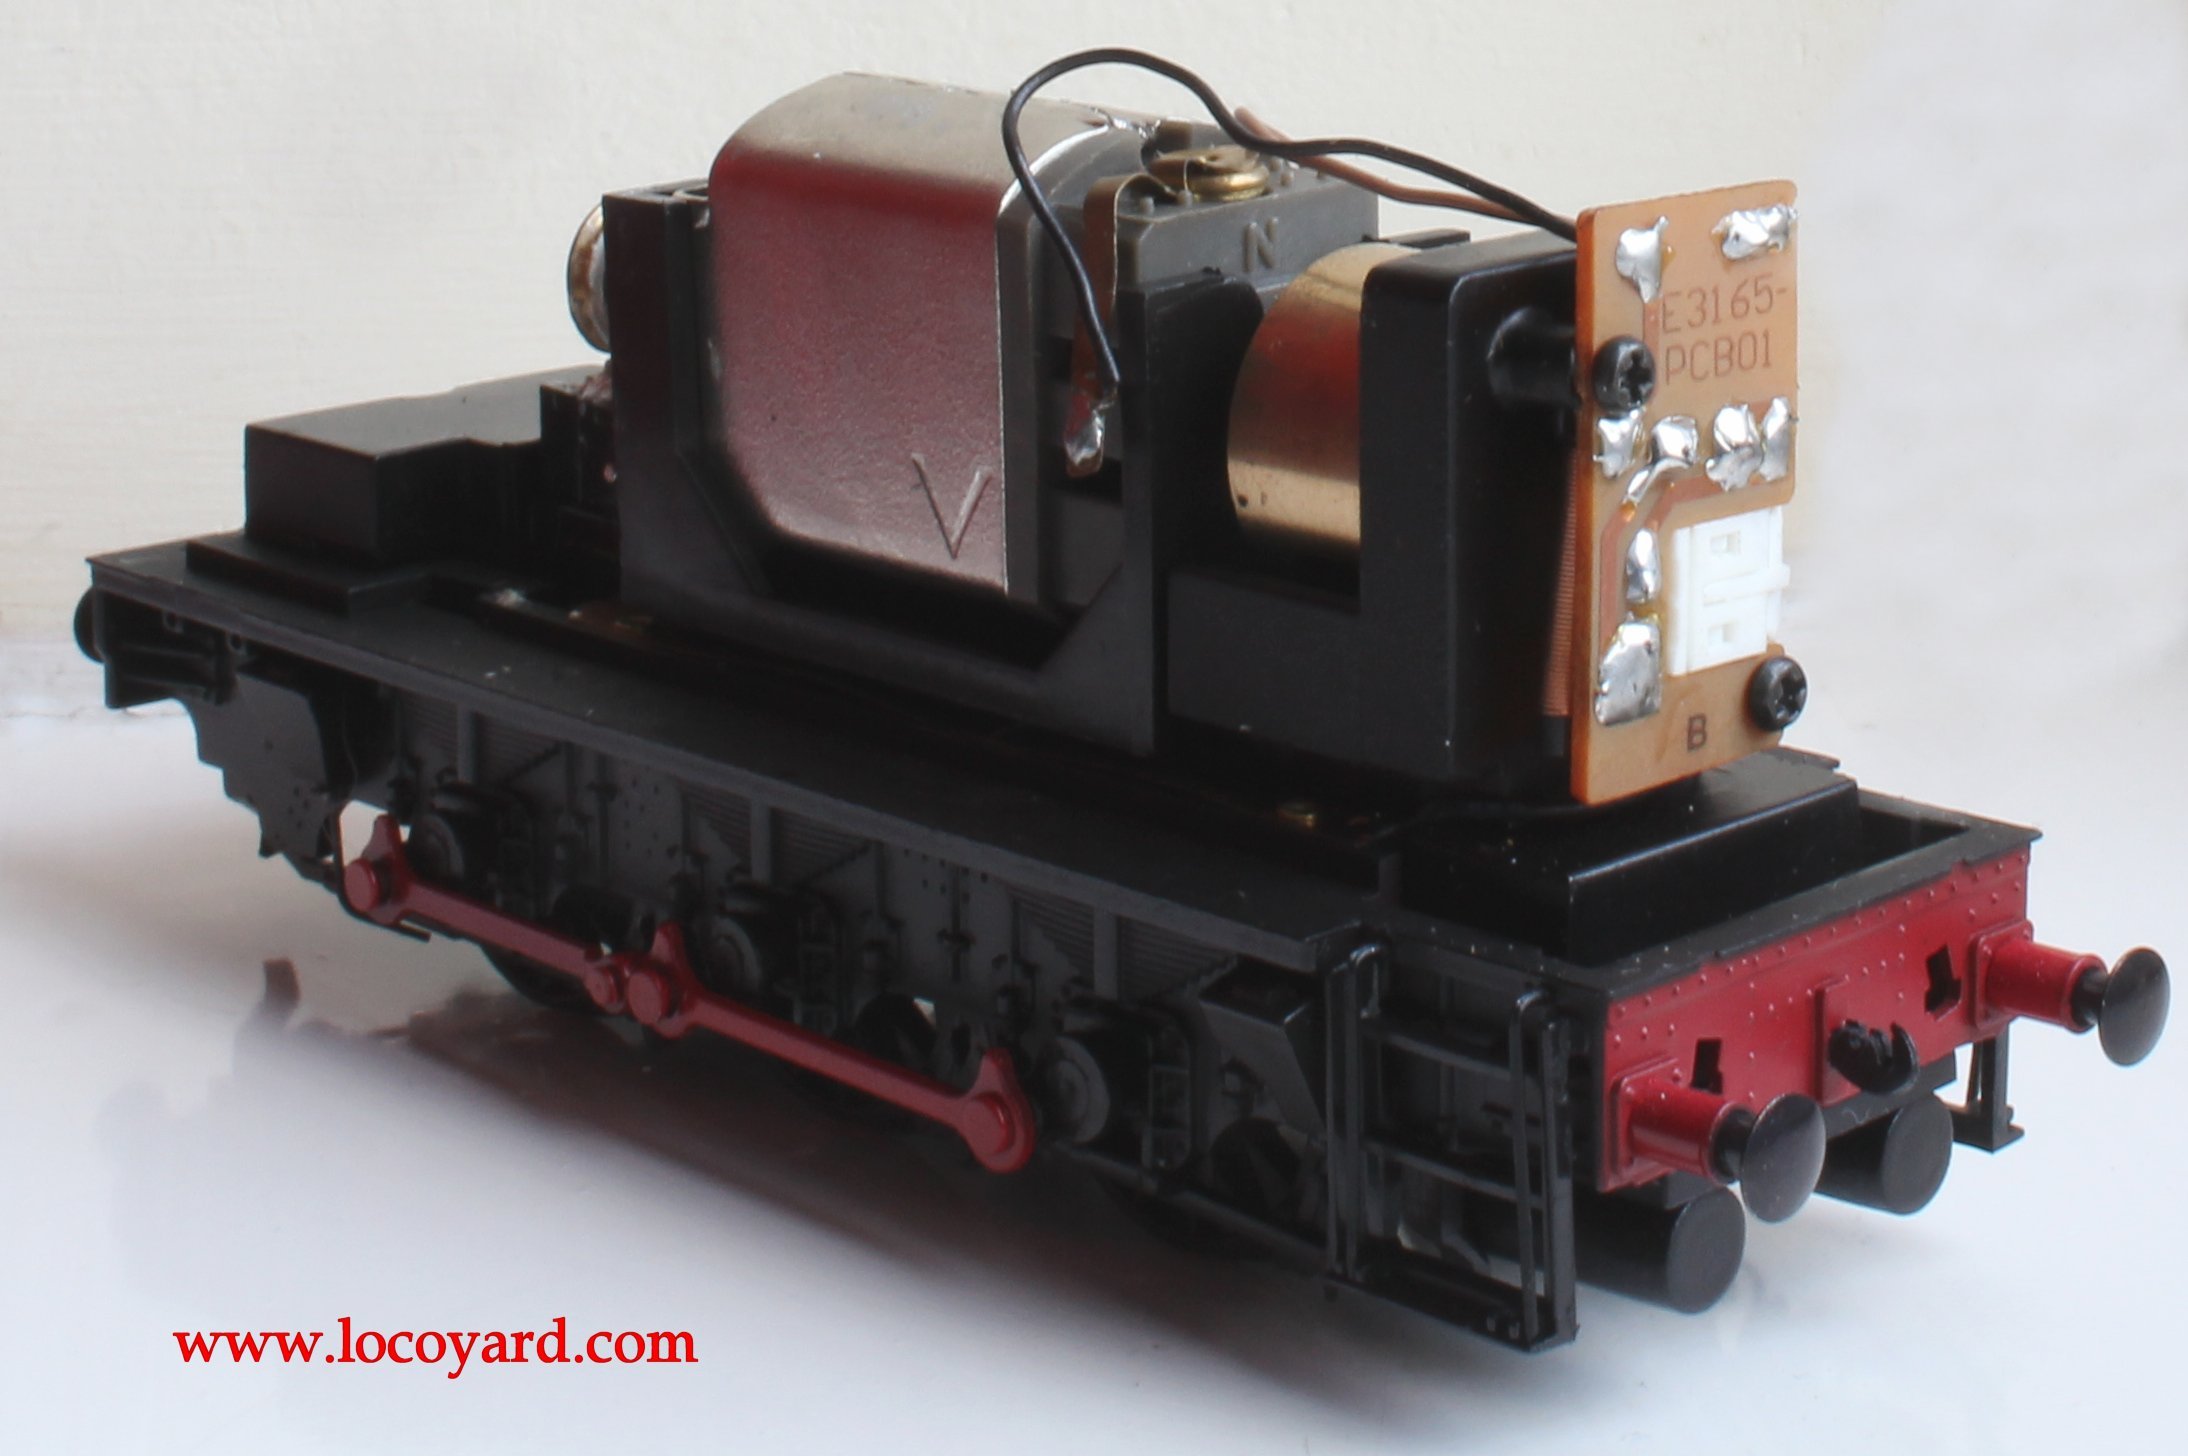
You will now need to remove the circuit board from the front of the chassis by unscrewing as indicated below.
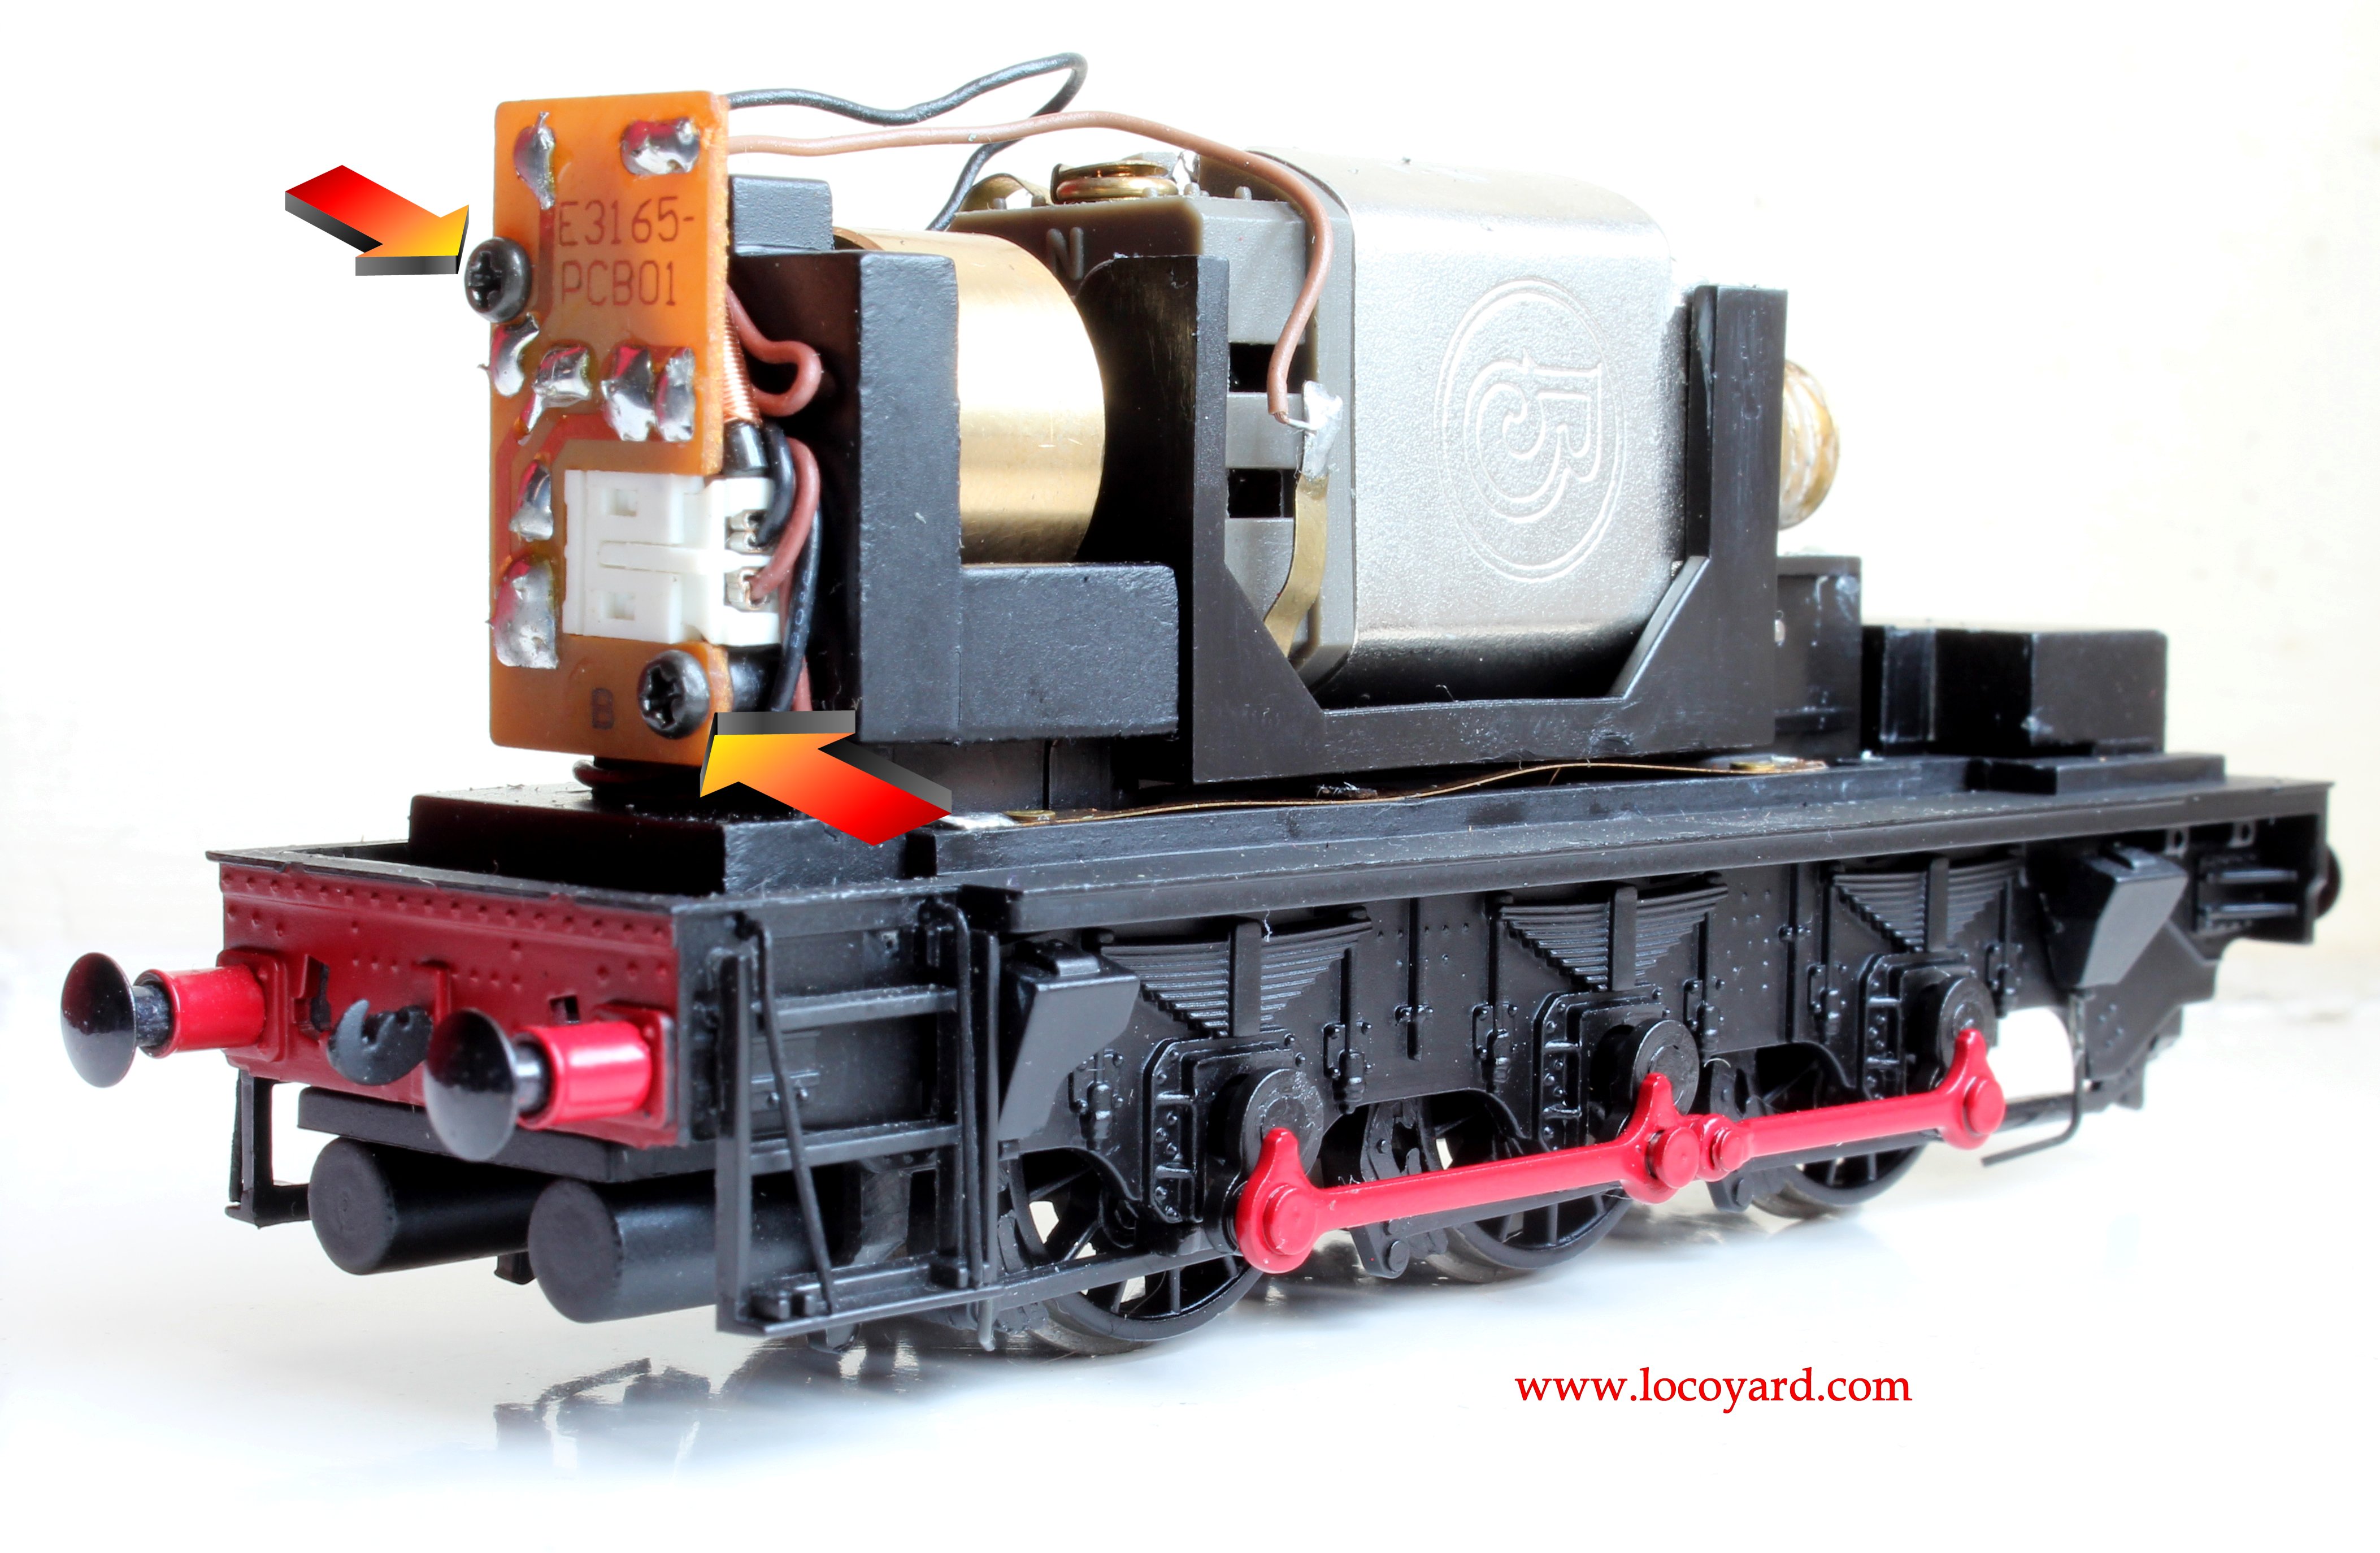 Finally you will need to saw or file down the two metal projections that the screws were attached too. This is where the DCC decoder will go.
 You will also need to unsolder the four wires away from the motor and pickup’s. Unsolder at the pick-up’s and motor, not from the board – you will not need these wires and circuit board once the job is complete.
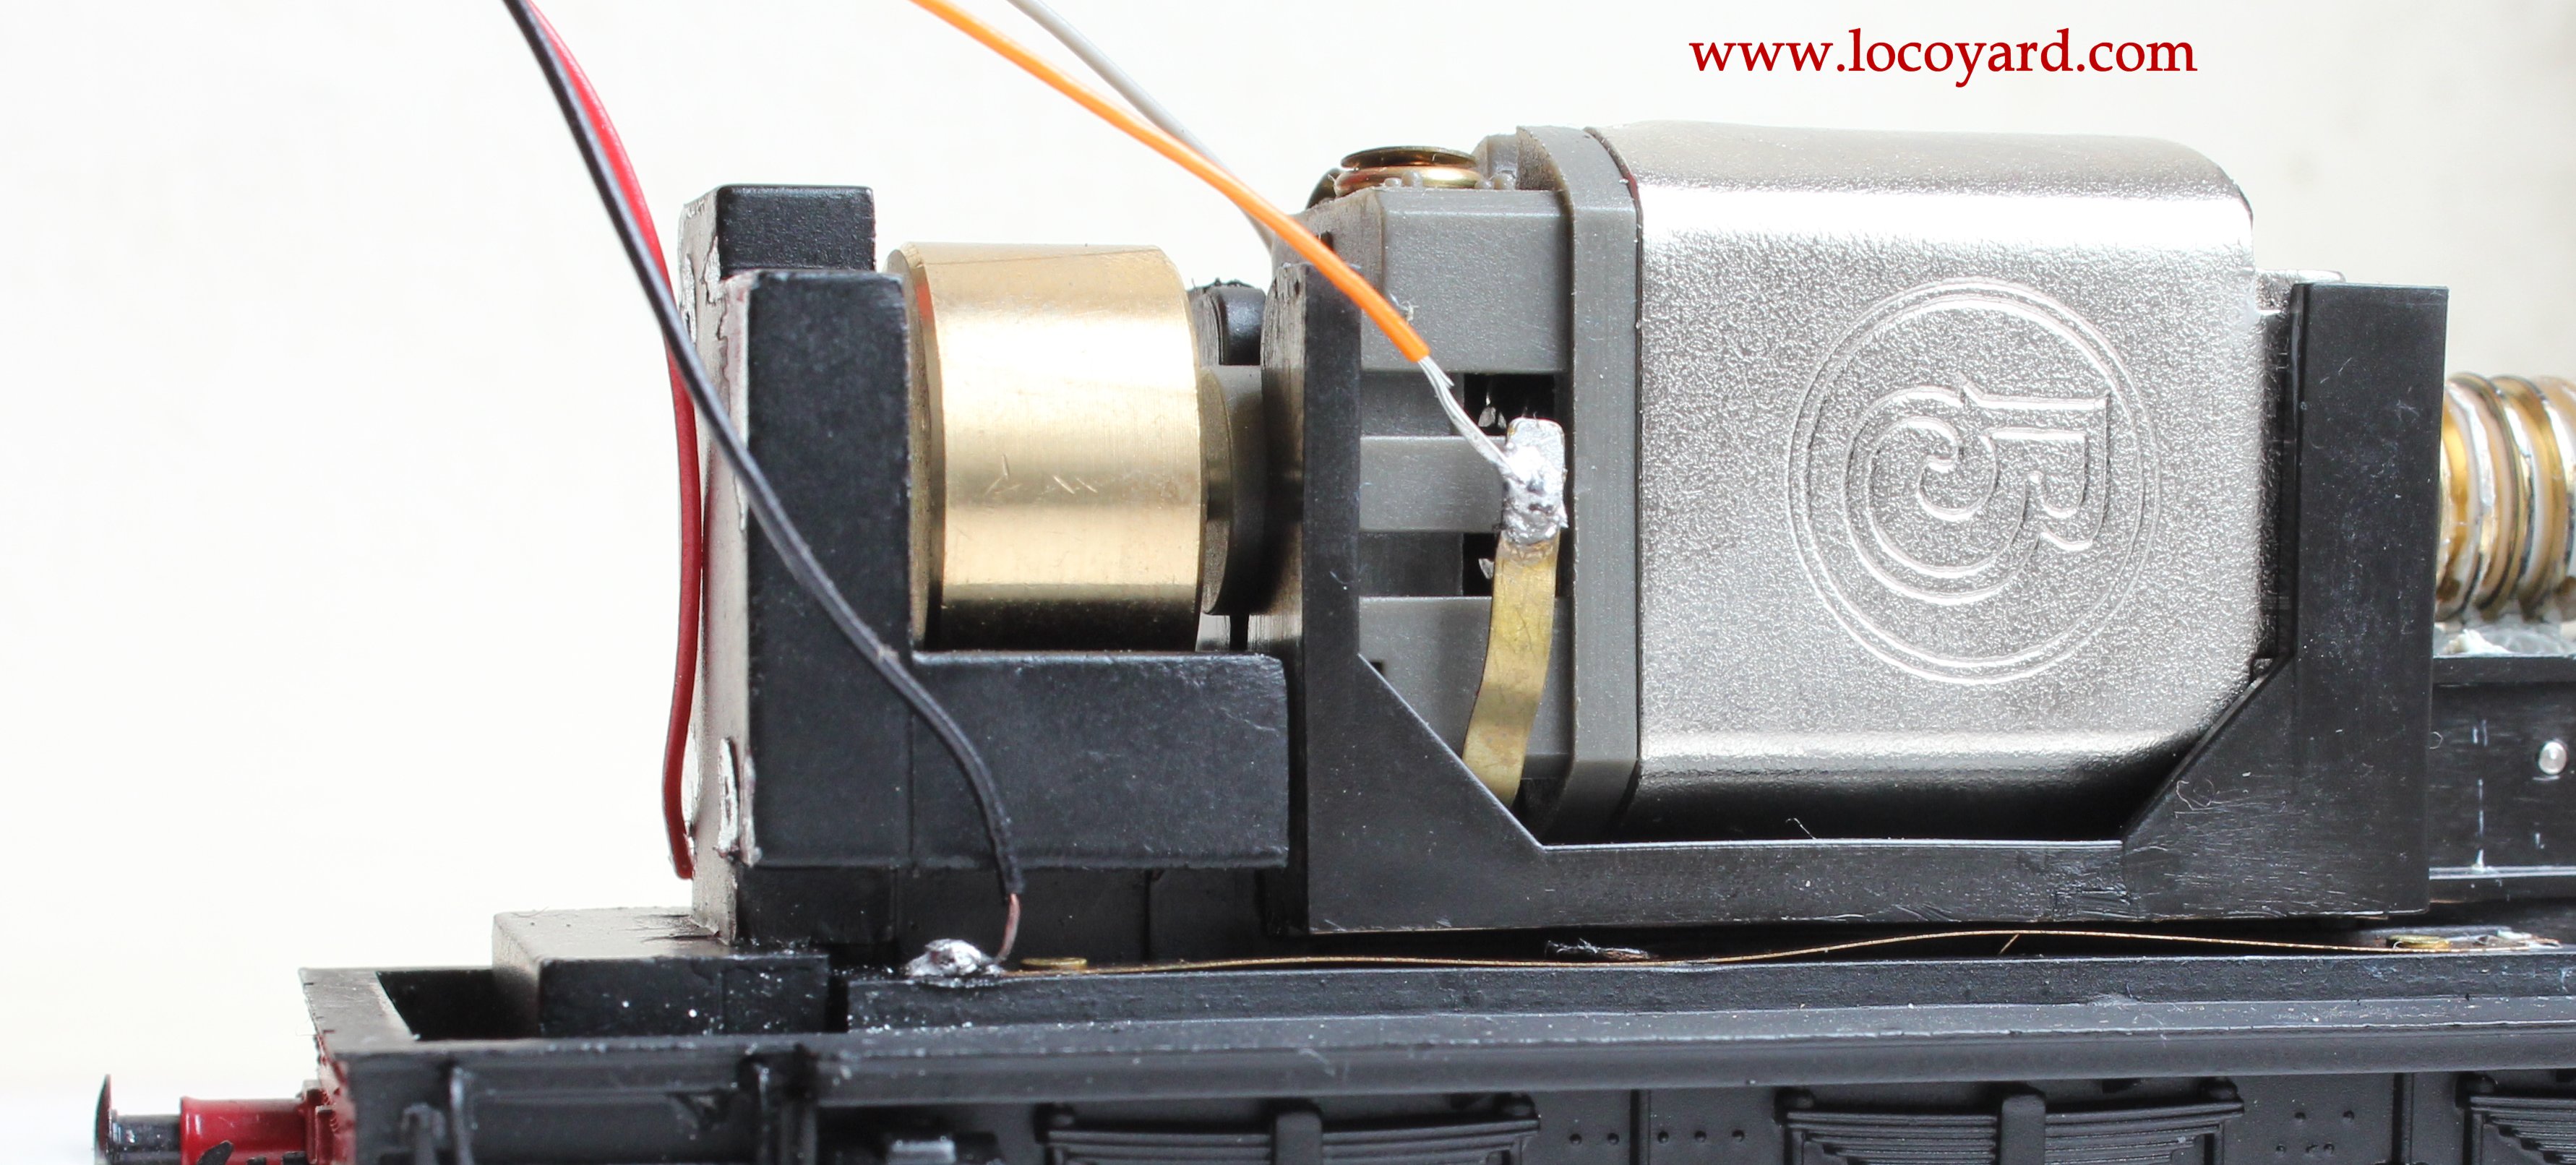
Step C – Soldering and DCC Fitting
You will need to choose a small to medium DCC decoder as space is limited, if not tiny. I choose a Hattons DCC decoder as I wasn’t prepared to put an expense DCC chip in to a cheap model! It also benefits that it can easily have a “stay alive” capacitor added if required. This DCC decoder has a separate harness from that allows handling of the wires without handling the decoder – a real bonus for hard-wiring.
Remove the 8-pin plug from the decoder by cutting the cables, leaving enough cable length from the decoder. You will not need a lot of wire. Cut back any wires not required, leaving the black, red, orange grey wires that have to be trimmed back to expose the wire.

Soldering is the relatively easy bit (that said, being self-taught I’m very slow at doing it!) Follow the rule red and black to the track, orange and grey the other way and you can’t go too wrong. More specifically, black goes to the left-hand pickup strip, red to the right-hand pickup strip, orange to the left side of the motor and grey to the right side motor.

Left-hand side:
 Right-hand side:
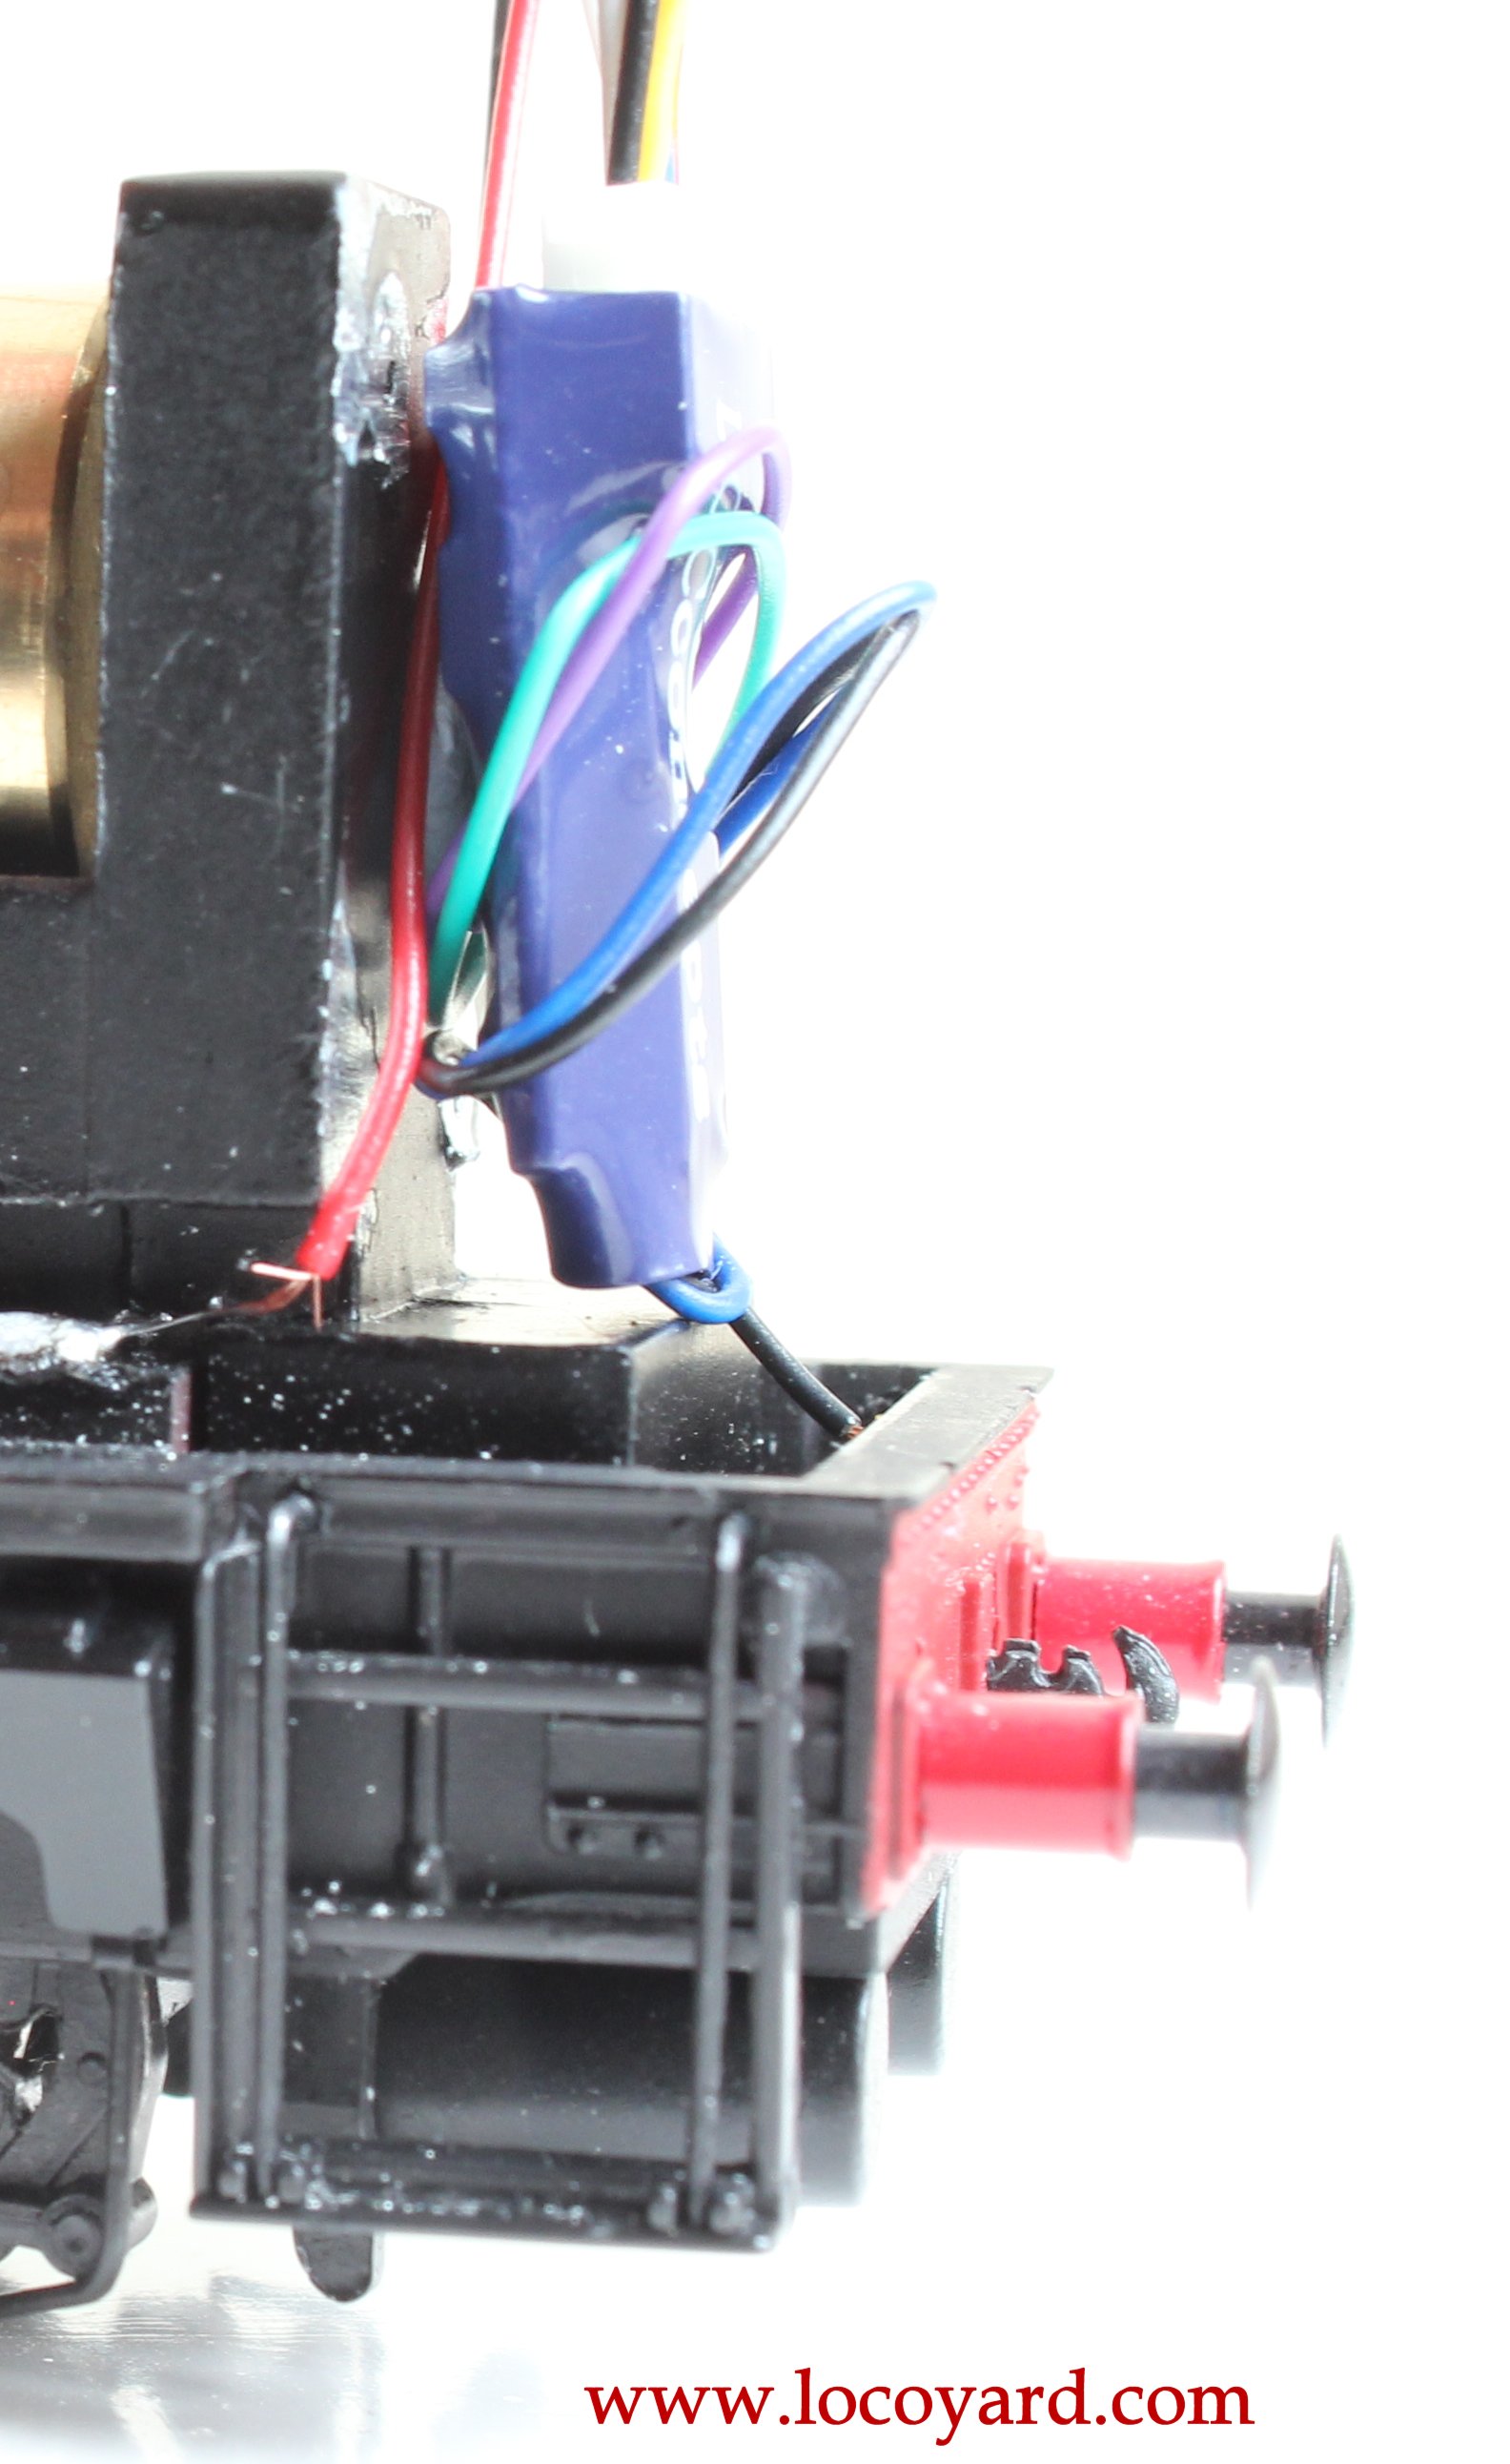
 With wiring complete, a small piece of bluetac can be used to attach the DCC decoder to the front of the mechanism where the circuit board used to live.
 Test that the loco works now and re-fit wires if necessary. Once you are happy, insulate the wires and carefully fit the chassis back together again. Finally, the picture below hopefully will remind you which length of screw to use at the front or back!
 Step D
Play with your DCC fitted train! Don’t forget that this is one of many DCC fitting guides, click here to see what other guides have been published.

Another superb tutorial – my 08 is already shunting merrilly around the layout. One point though. In Step C – third paragraph – it says that the orange goes to the right hand side. Luckily all the other diagrams and info state that it is the left hand. Other than that, thanks again, your tutorials helped me with my J83 and now with my 08. I’ll definitely visit again. Pete L!
LikeLike
Hi,
Thank you so much for the comment and pointing out the error, it is very much appreciated. Apologies for the mistake, the text is updated now. I’m glad the guides were of use and thanks for the visit, you’re always welcome here!
All the best,
Dave
LikeLike
Thanks got this – I found it a dodge yo hard wire my first decoder today thanks to your vest instructions. Cheers!
LikeLike
excellent guide thank you
LikeLike