
The standard 0-6-0 chassis with type 7 motor has for some time been used in a lot of Hornby model locomotives! The list of models below may not be 100% complete, but covers some of the major types where it is used.
Hornby models using the Type 7 0-6-0 chassis:
BR class 08 diesel shunter
GNR J13/LNER J52
LNER J83
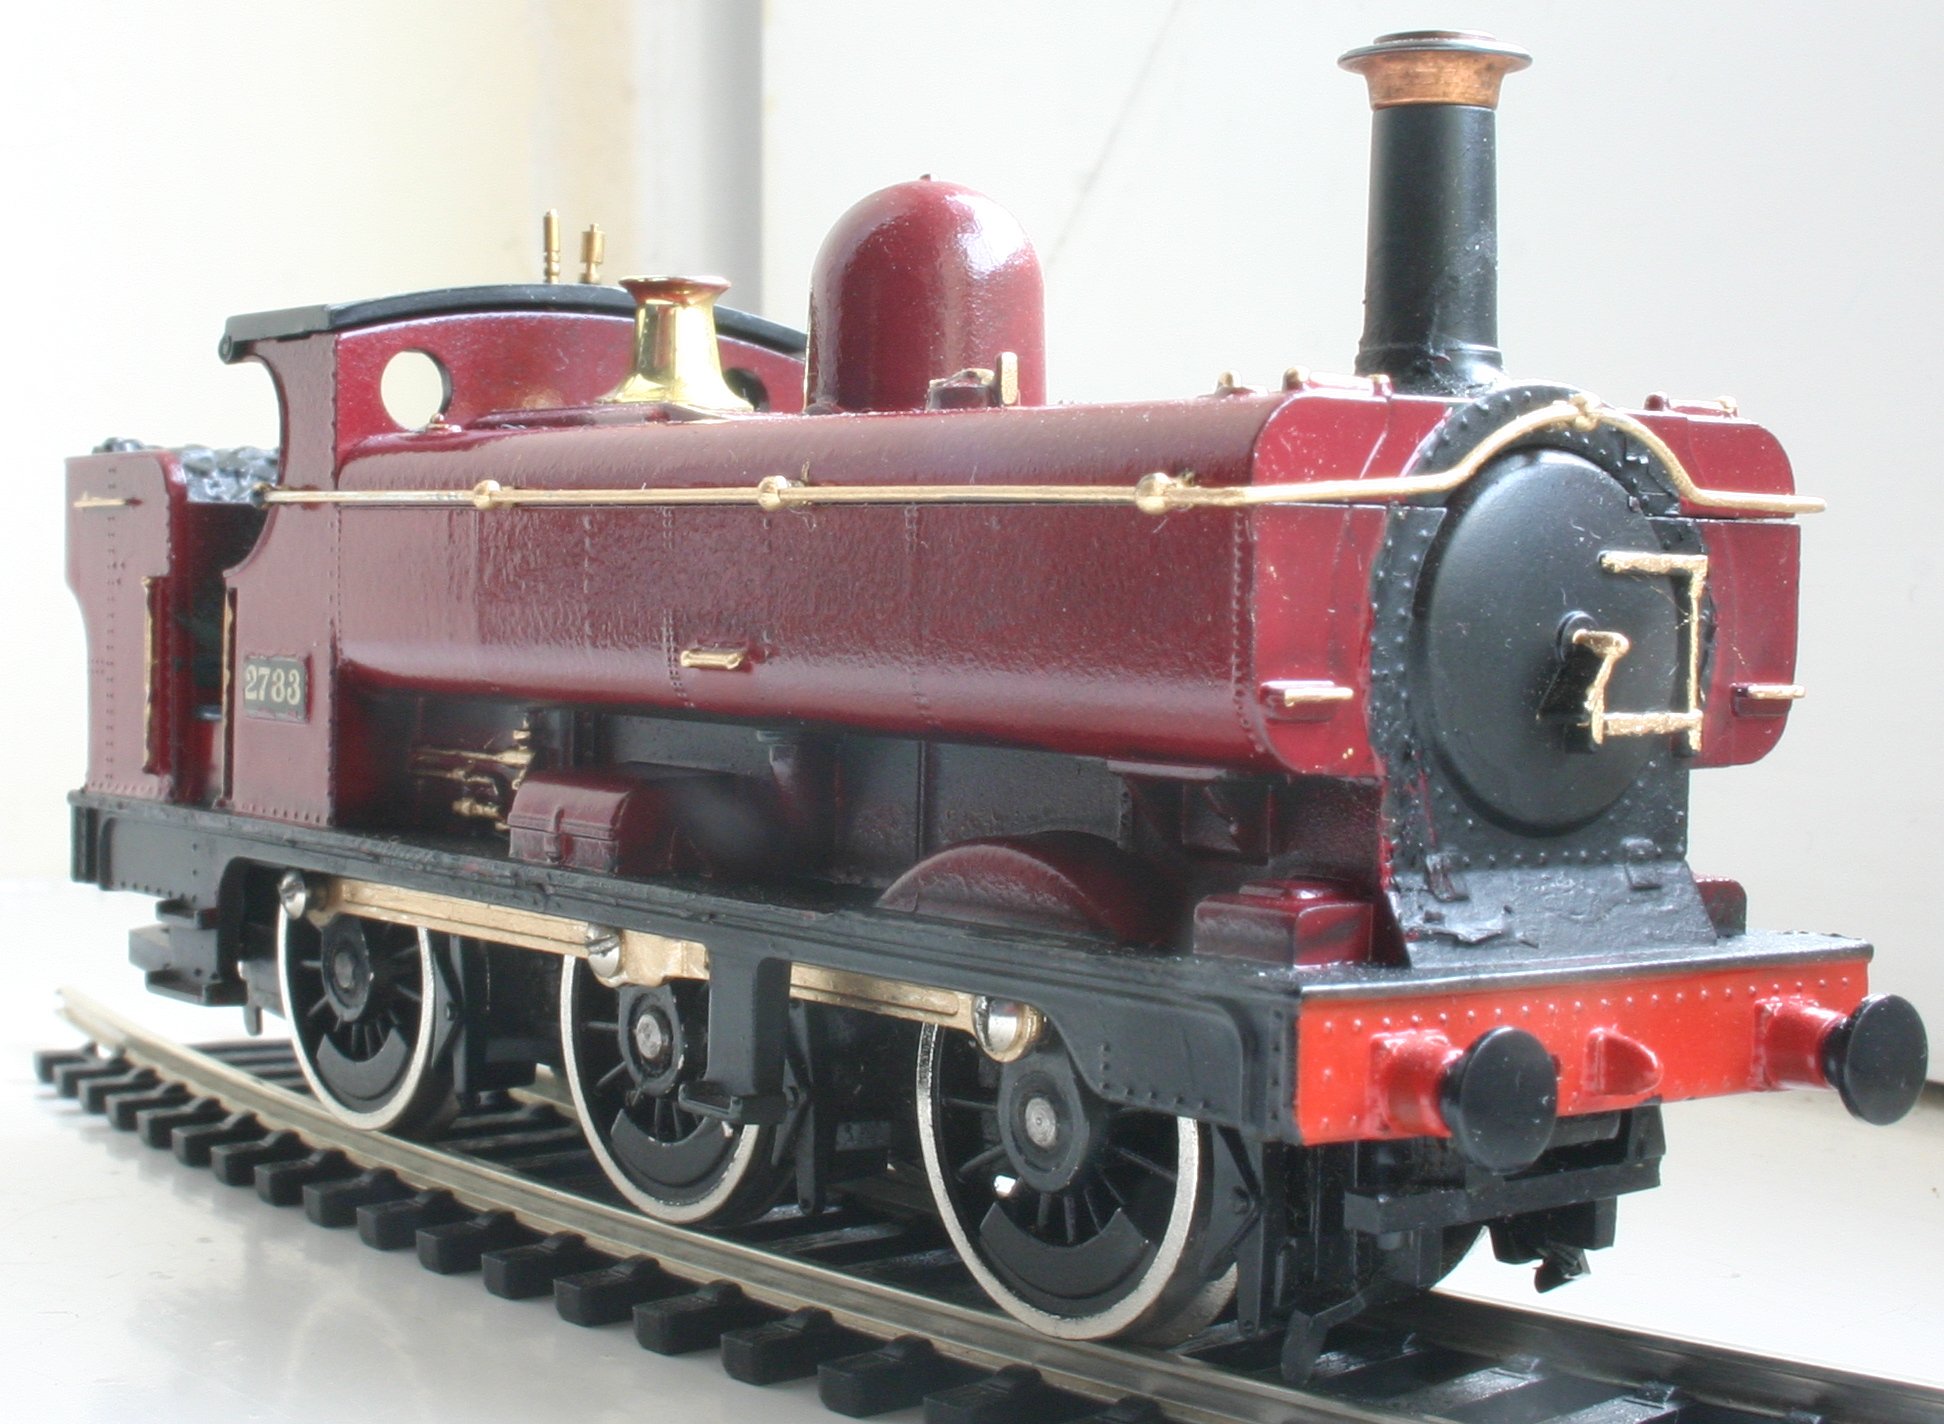
Midland 3F Jinty
GWR open pannier class 2721
GWR 57xx (discontinued)
LBSCR E2 (discontinued)

Thomas the Tank Engine & friends:
Thomas
Duck
Diesel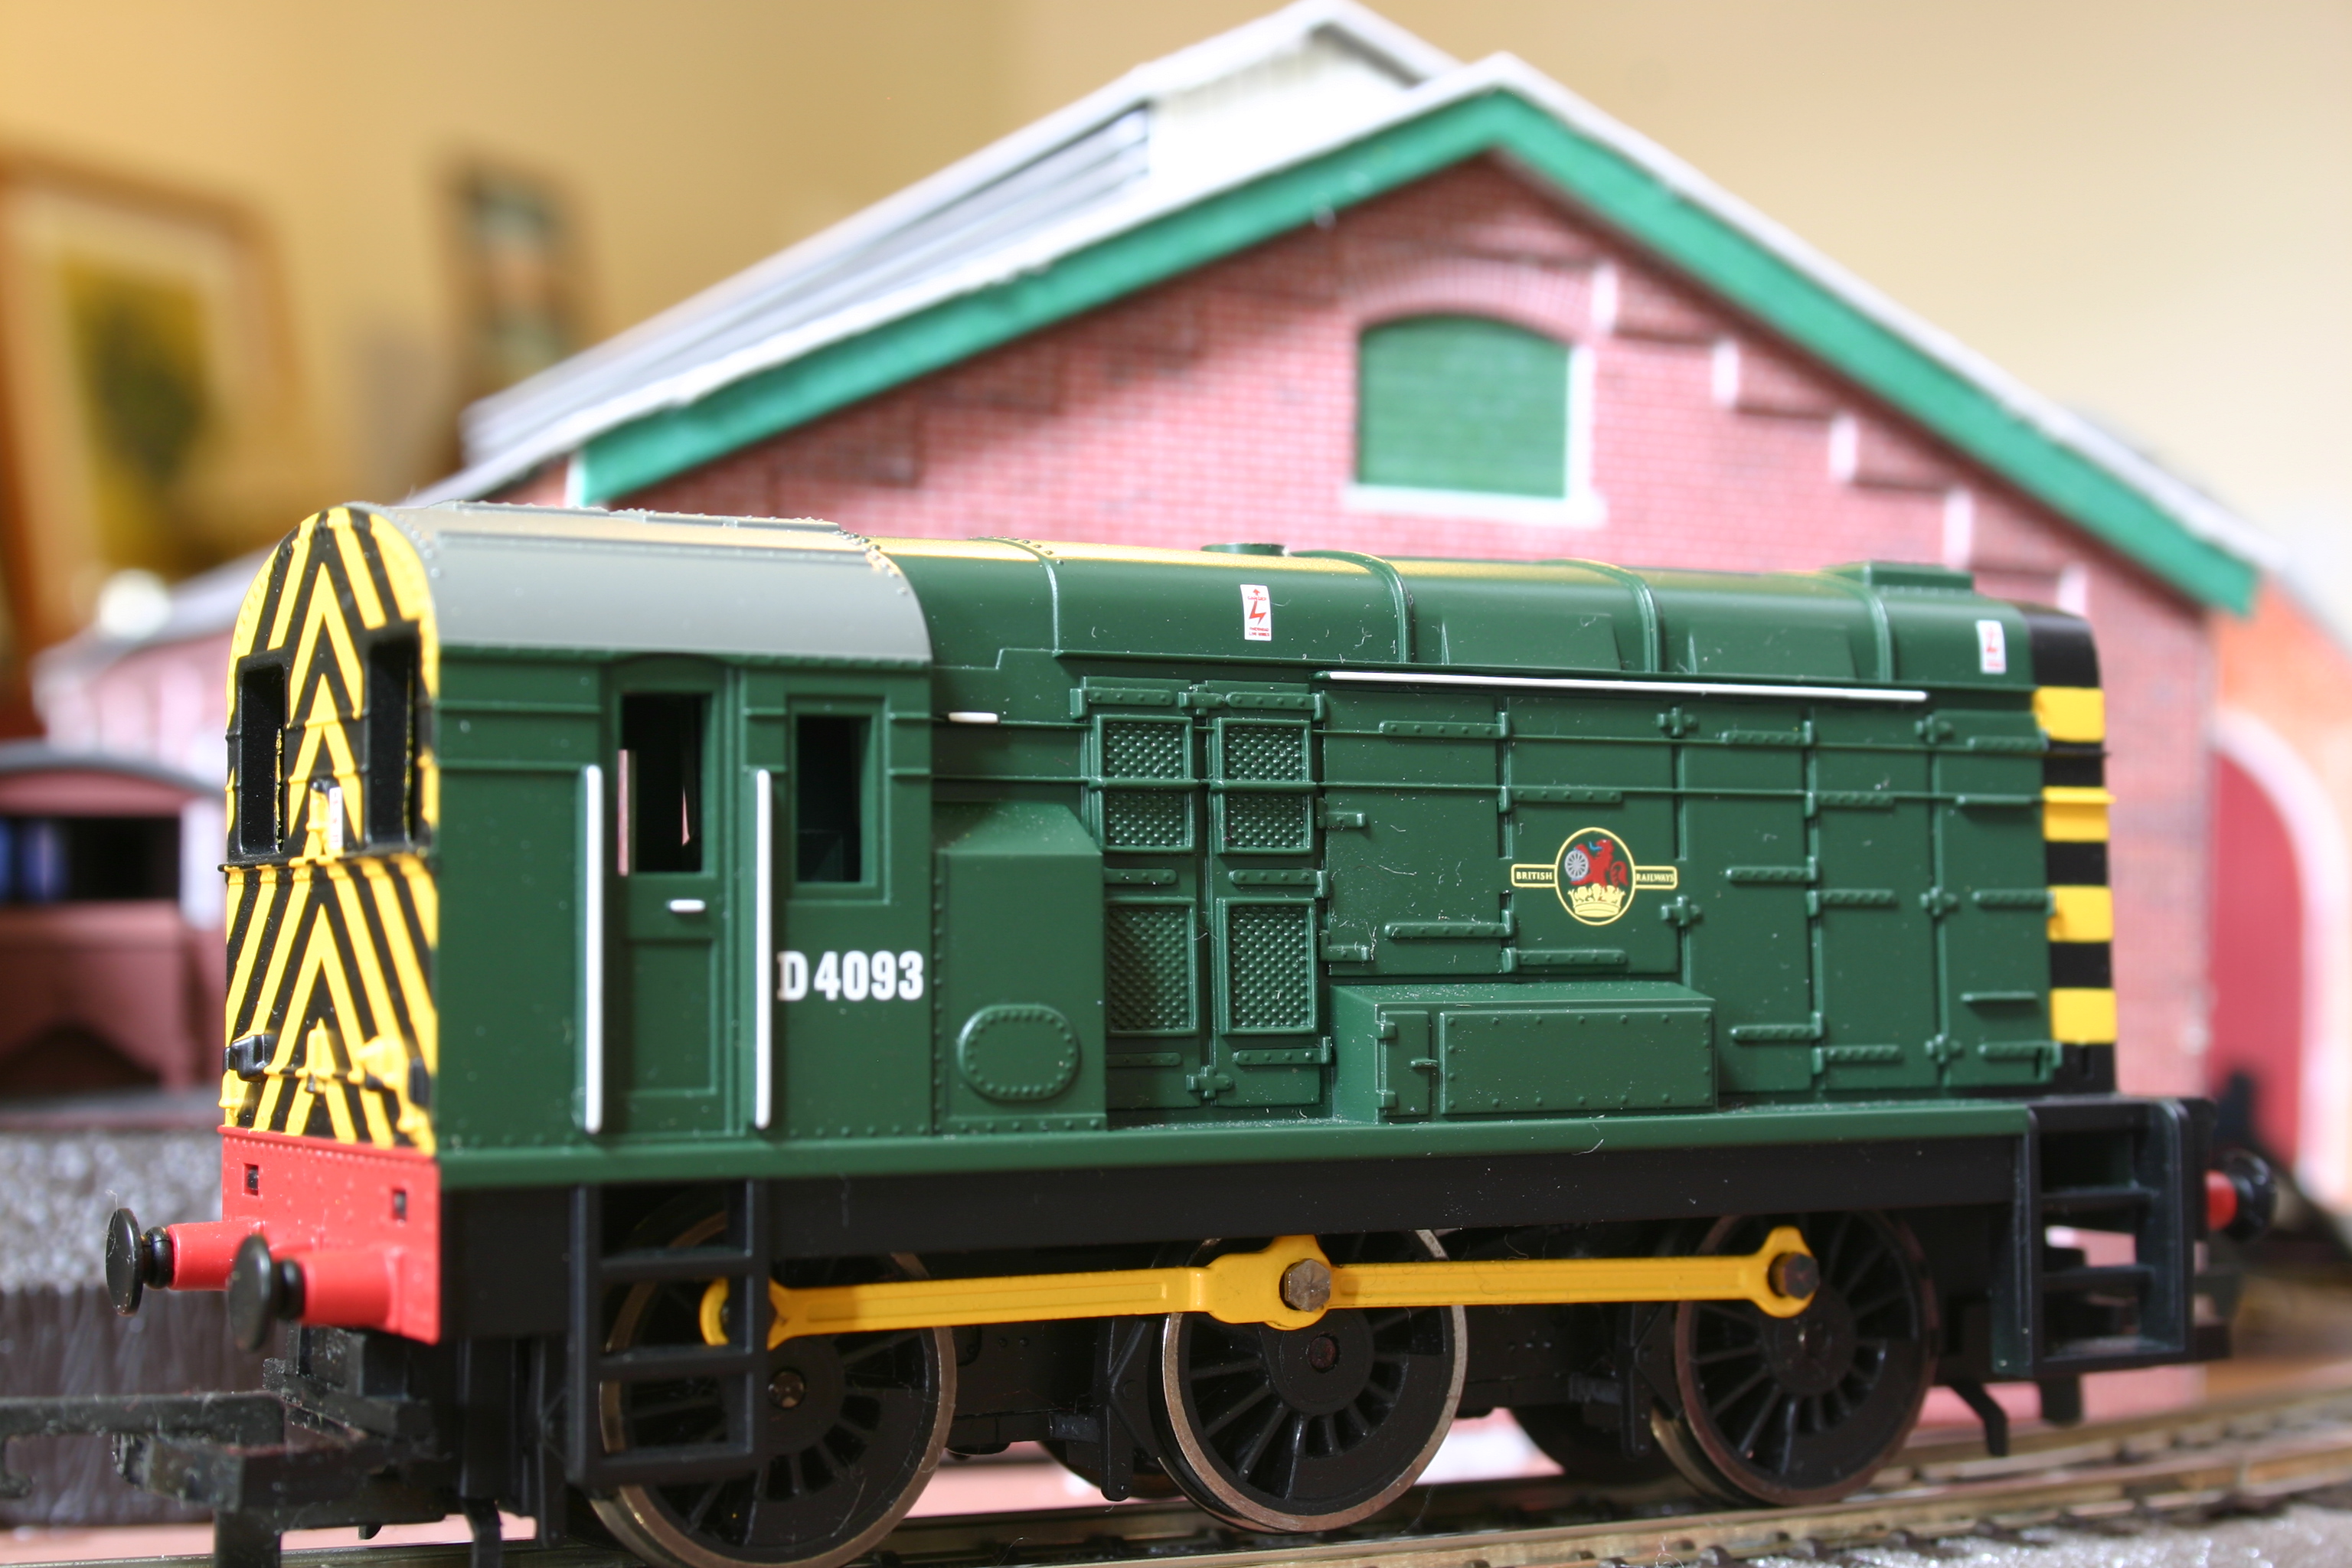
The 0-6-0 chassis is a reasonable performer and although its’ basic looks are not the best, it is tough and ideal for beginners – hence its’ continued use in Hornby’s Railroad and Thomas the Tank engine ranges. It has not yet been updated to be DCC ready however, so DC models require soldering to fit a DCC decoder.

DCC fitted models are cheap and common, but be warned! These factory fitted versions are very bulky and too big to fit in many older models, or Thomas the Tank engine. If you wish to run these models, a DCC decoder has to be hardwired to either the original or a new DC only chassis. So despite the availability of DCC fitted versions, this guide is still relevant and of use to many of you out there.
 As with any DCC installation, you need to be sure that you are fitting a decoder to a good running chassis before you start the work. The first step of the installation is to remove the body of the locomotive from the chassis.
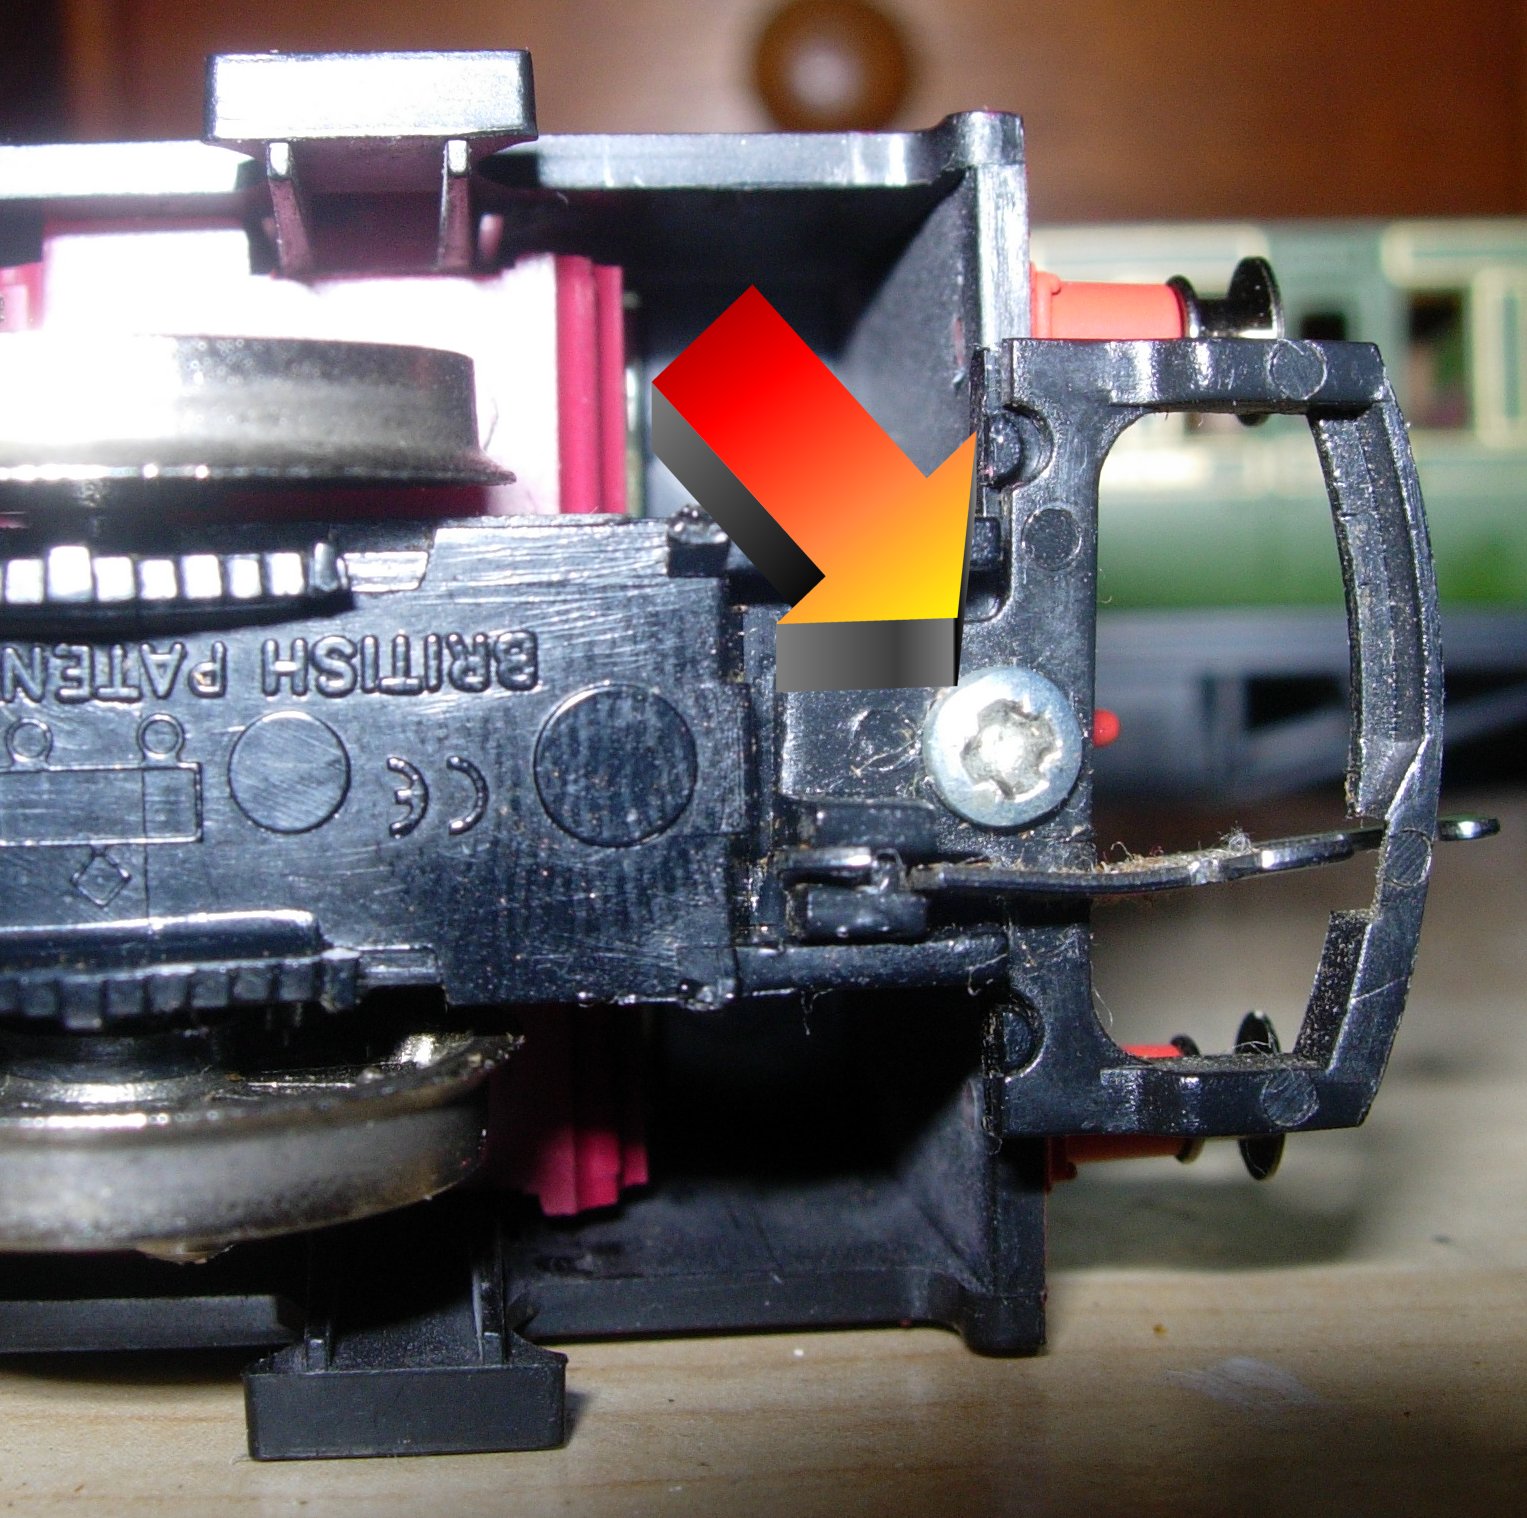
The body effectively clips onto the chassis and can be gently pulled apart from the back of the model as shown below – however, to do this, it is easiest to remove the rear coupling by undoing the screw as shown above first.
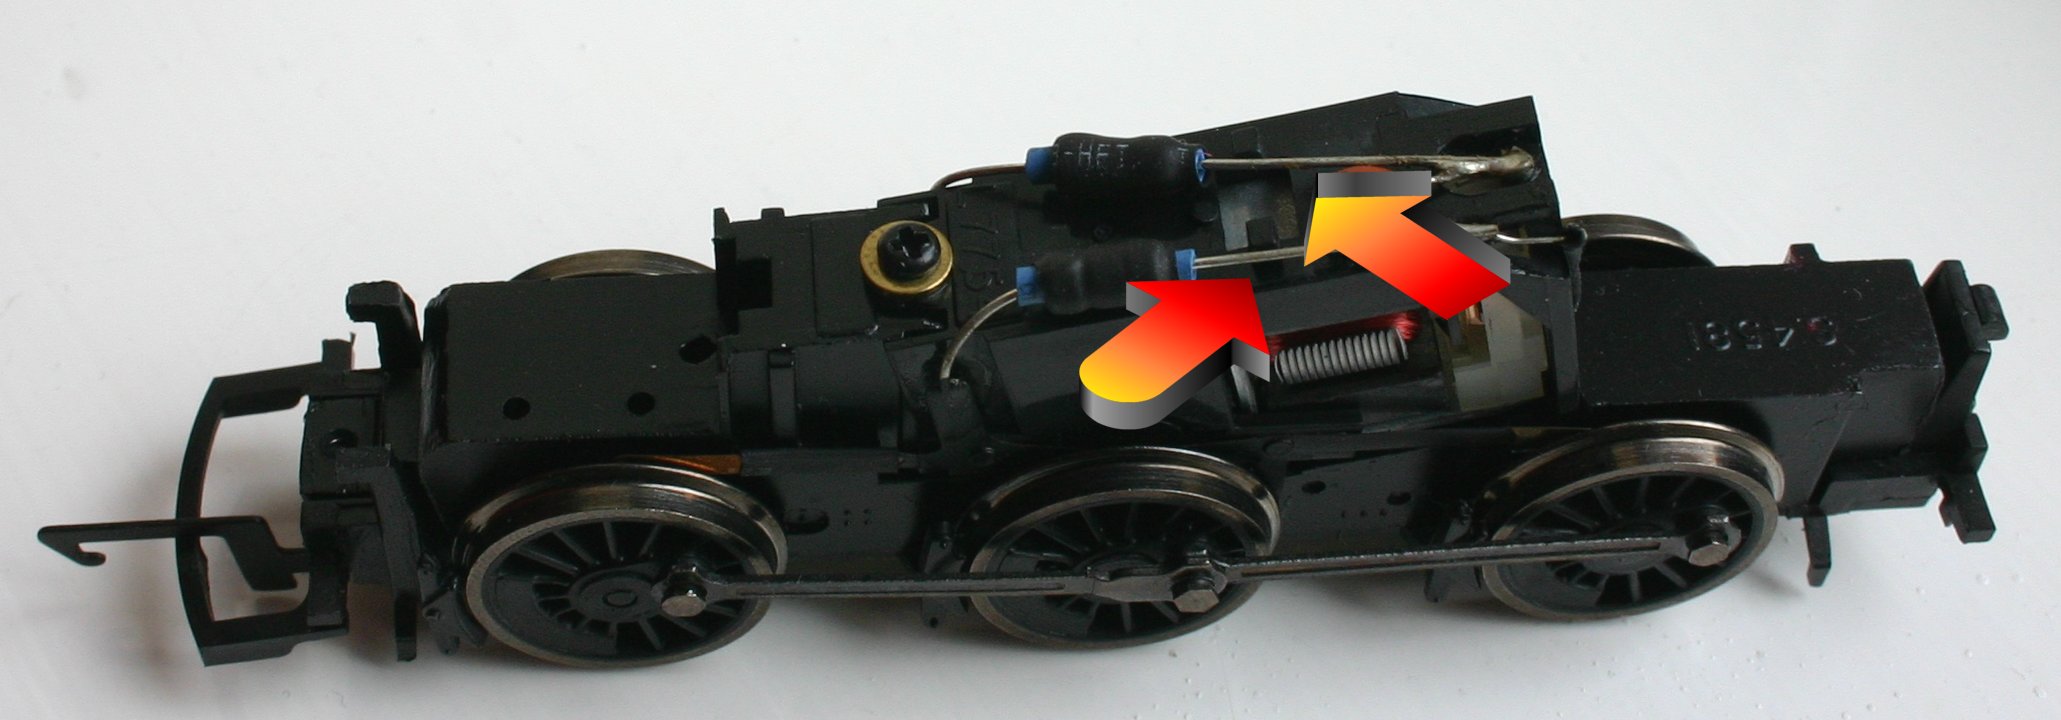
 The wiring is simple and motor easy to isolate. The two wires on top of the motor provide direct connections between pick-up’s and motor.
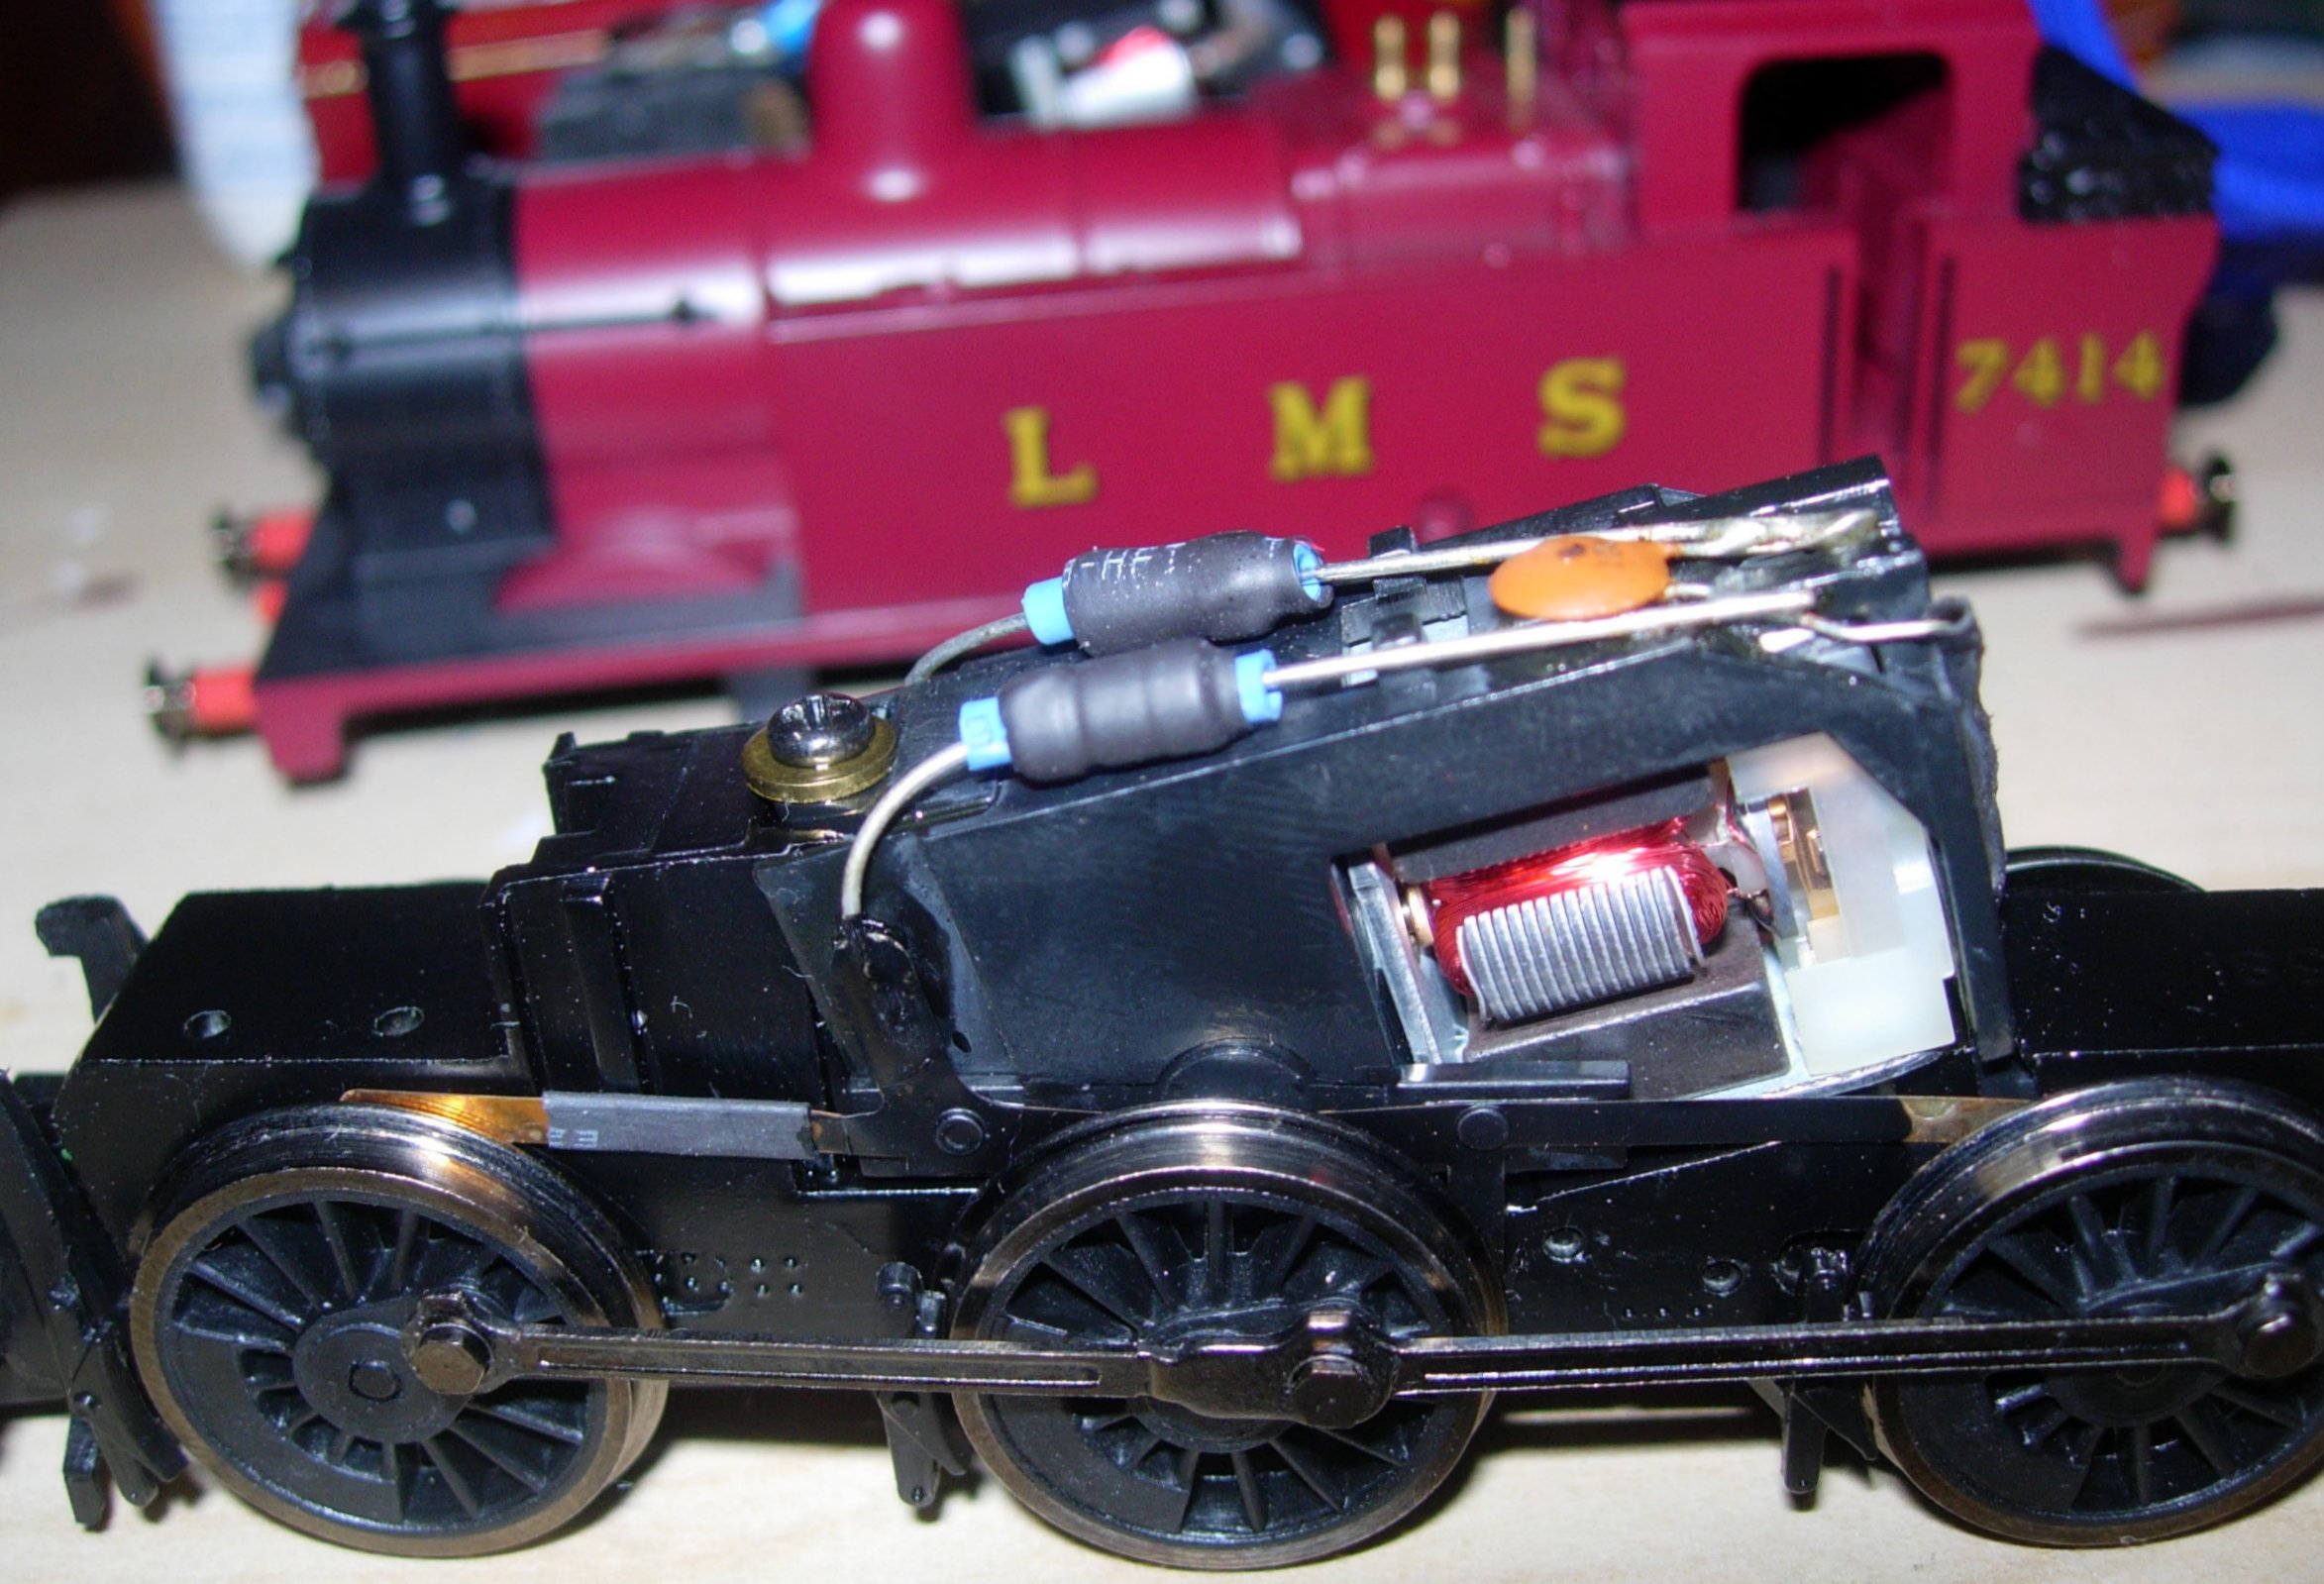 To isolate the motor, all you need to do is cut the two wires as indicated below.
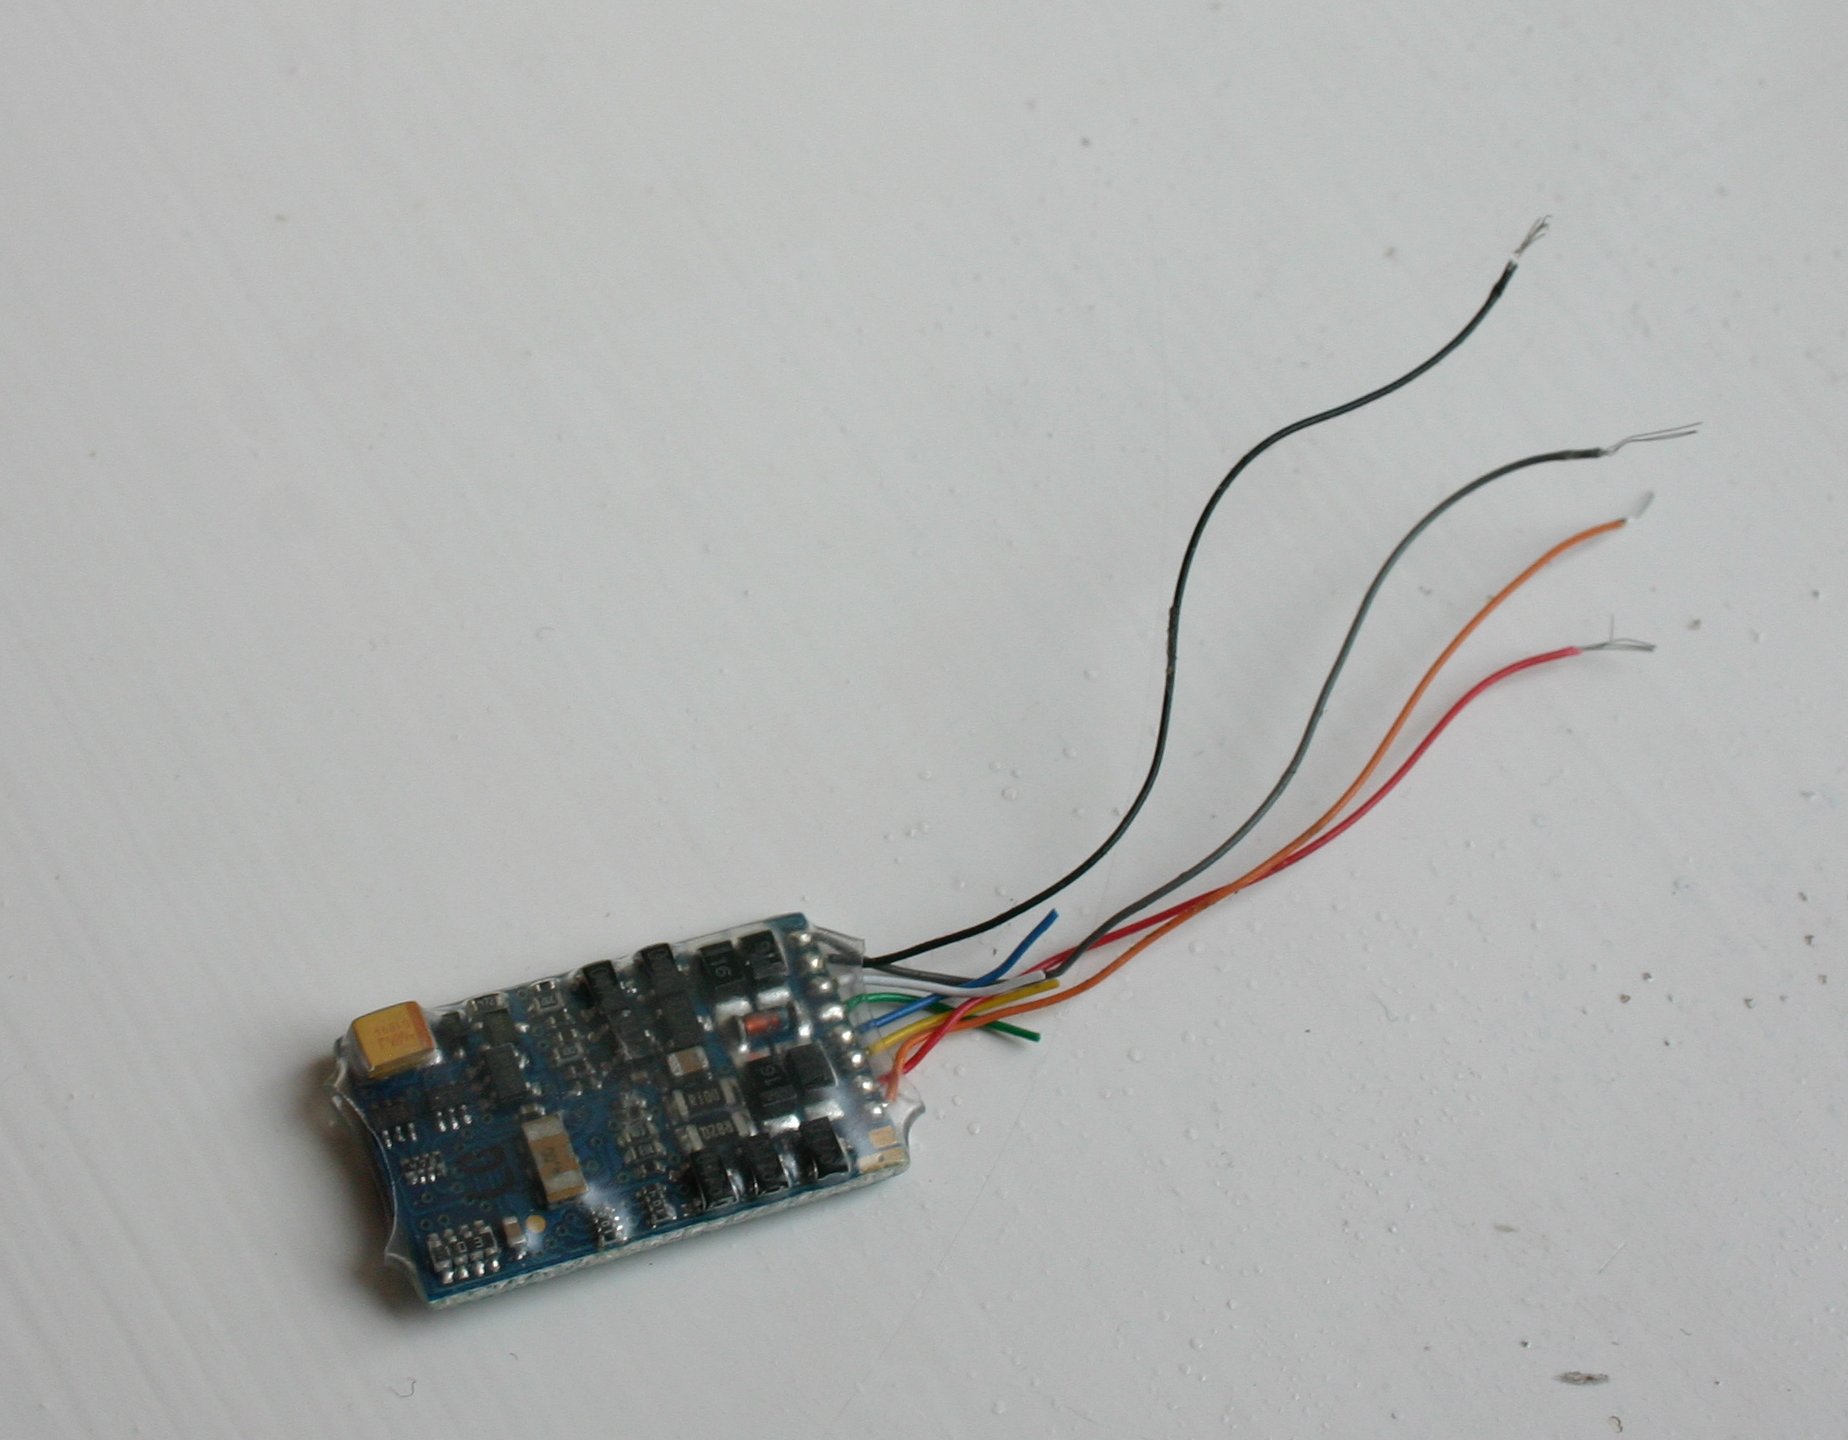
 Before you begin soldering, you will need to prepare the DCC decoder. You need not pick a tiny DCC chip, as long as it can fit somewhere in the body – in the case of Thomas or the E2 tank, the smokebox is ideal space. Remove the 8-pin plug from the decoder by cutting the cables, leaving enough cable length from the decoder. Cut back the wires not required, leaving the black, red, orange grey wires that have to be trimmed back to expose the wire.
 Soldering is the relatively easy bit. The rule; red and black to the track, orange and grey the other way is always helpful, but hopefully the picture and key will help explain better which wires to connect –
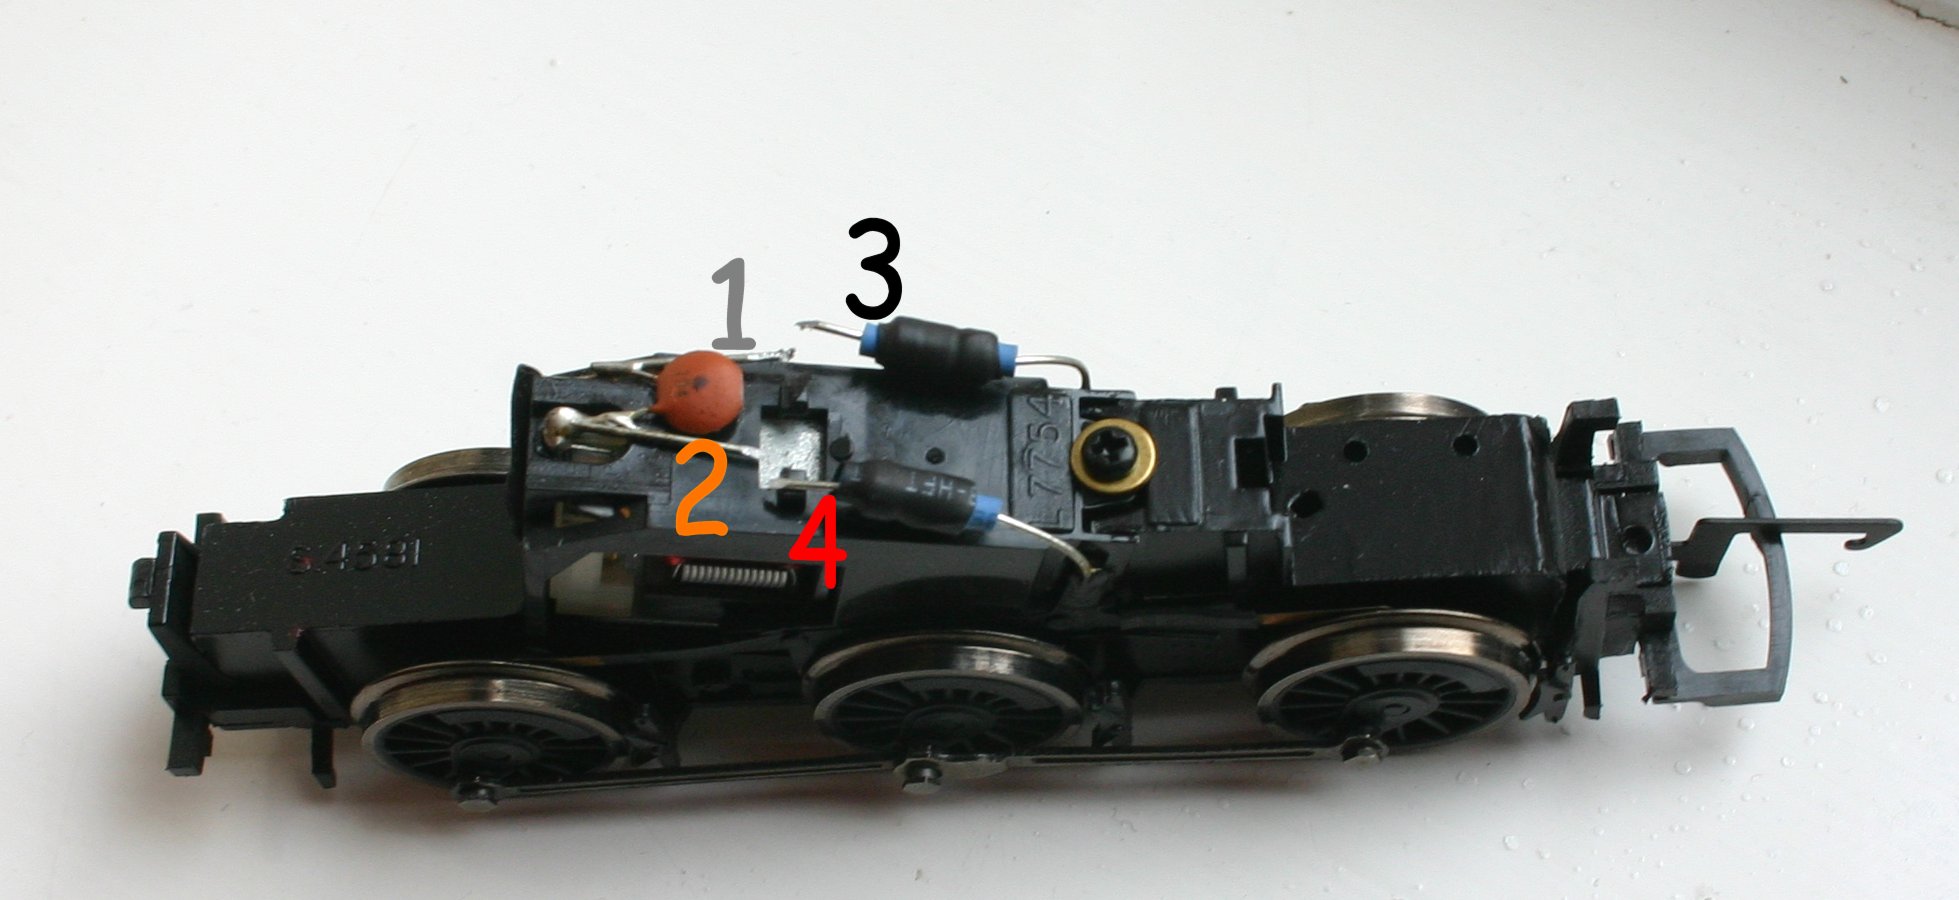 Connect as follows:
1 – Grey
2 – Orange
3 – Black
4 – Red
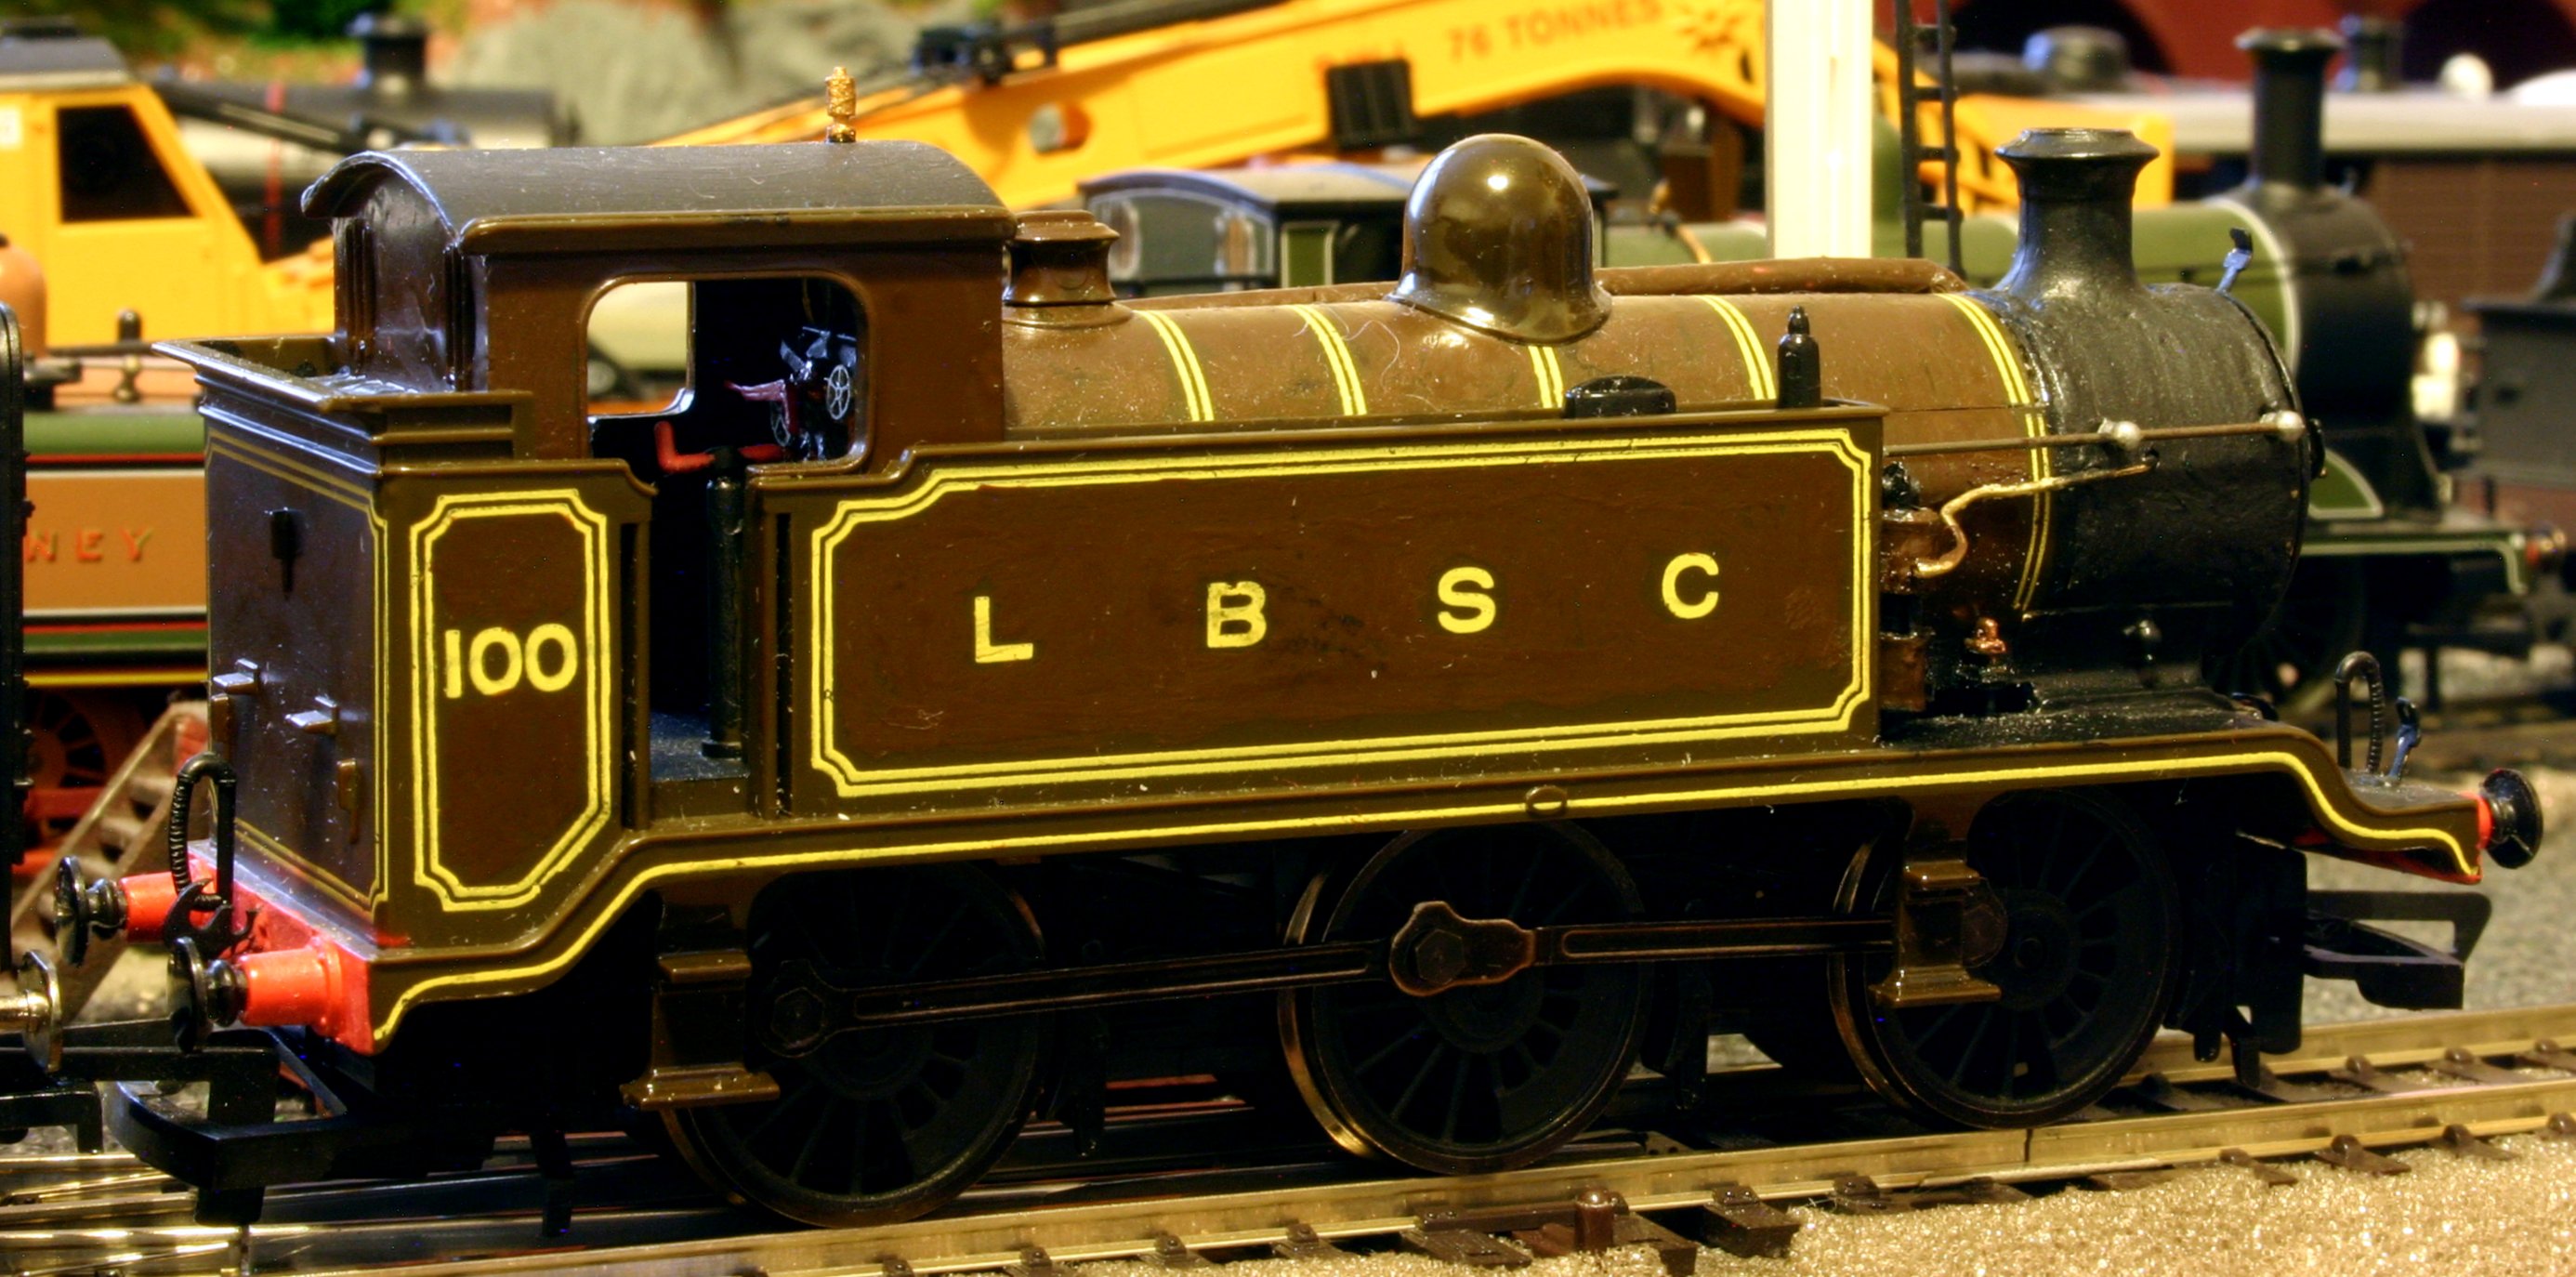
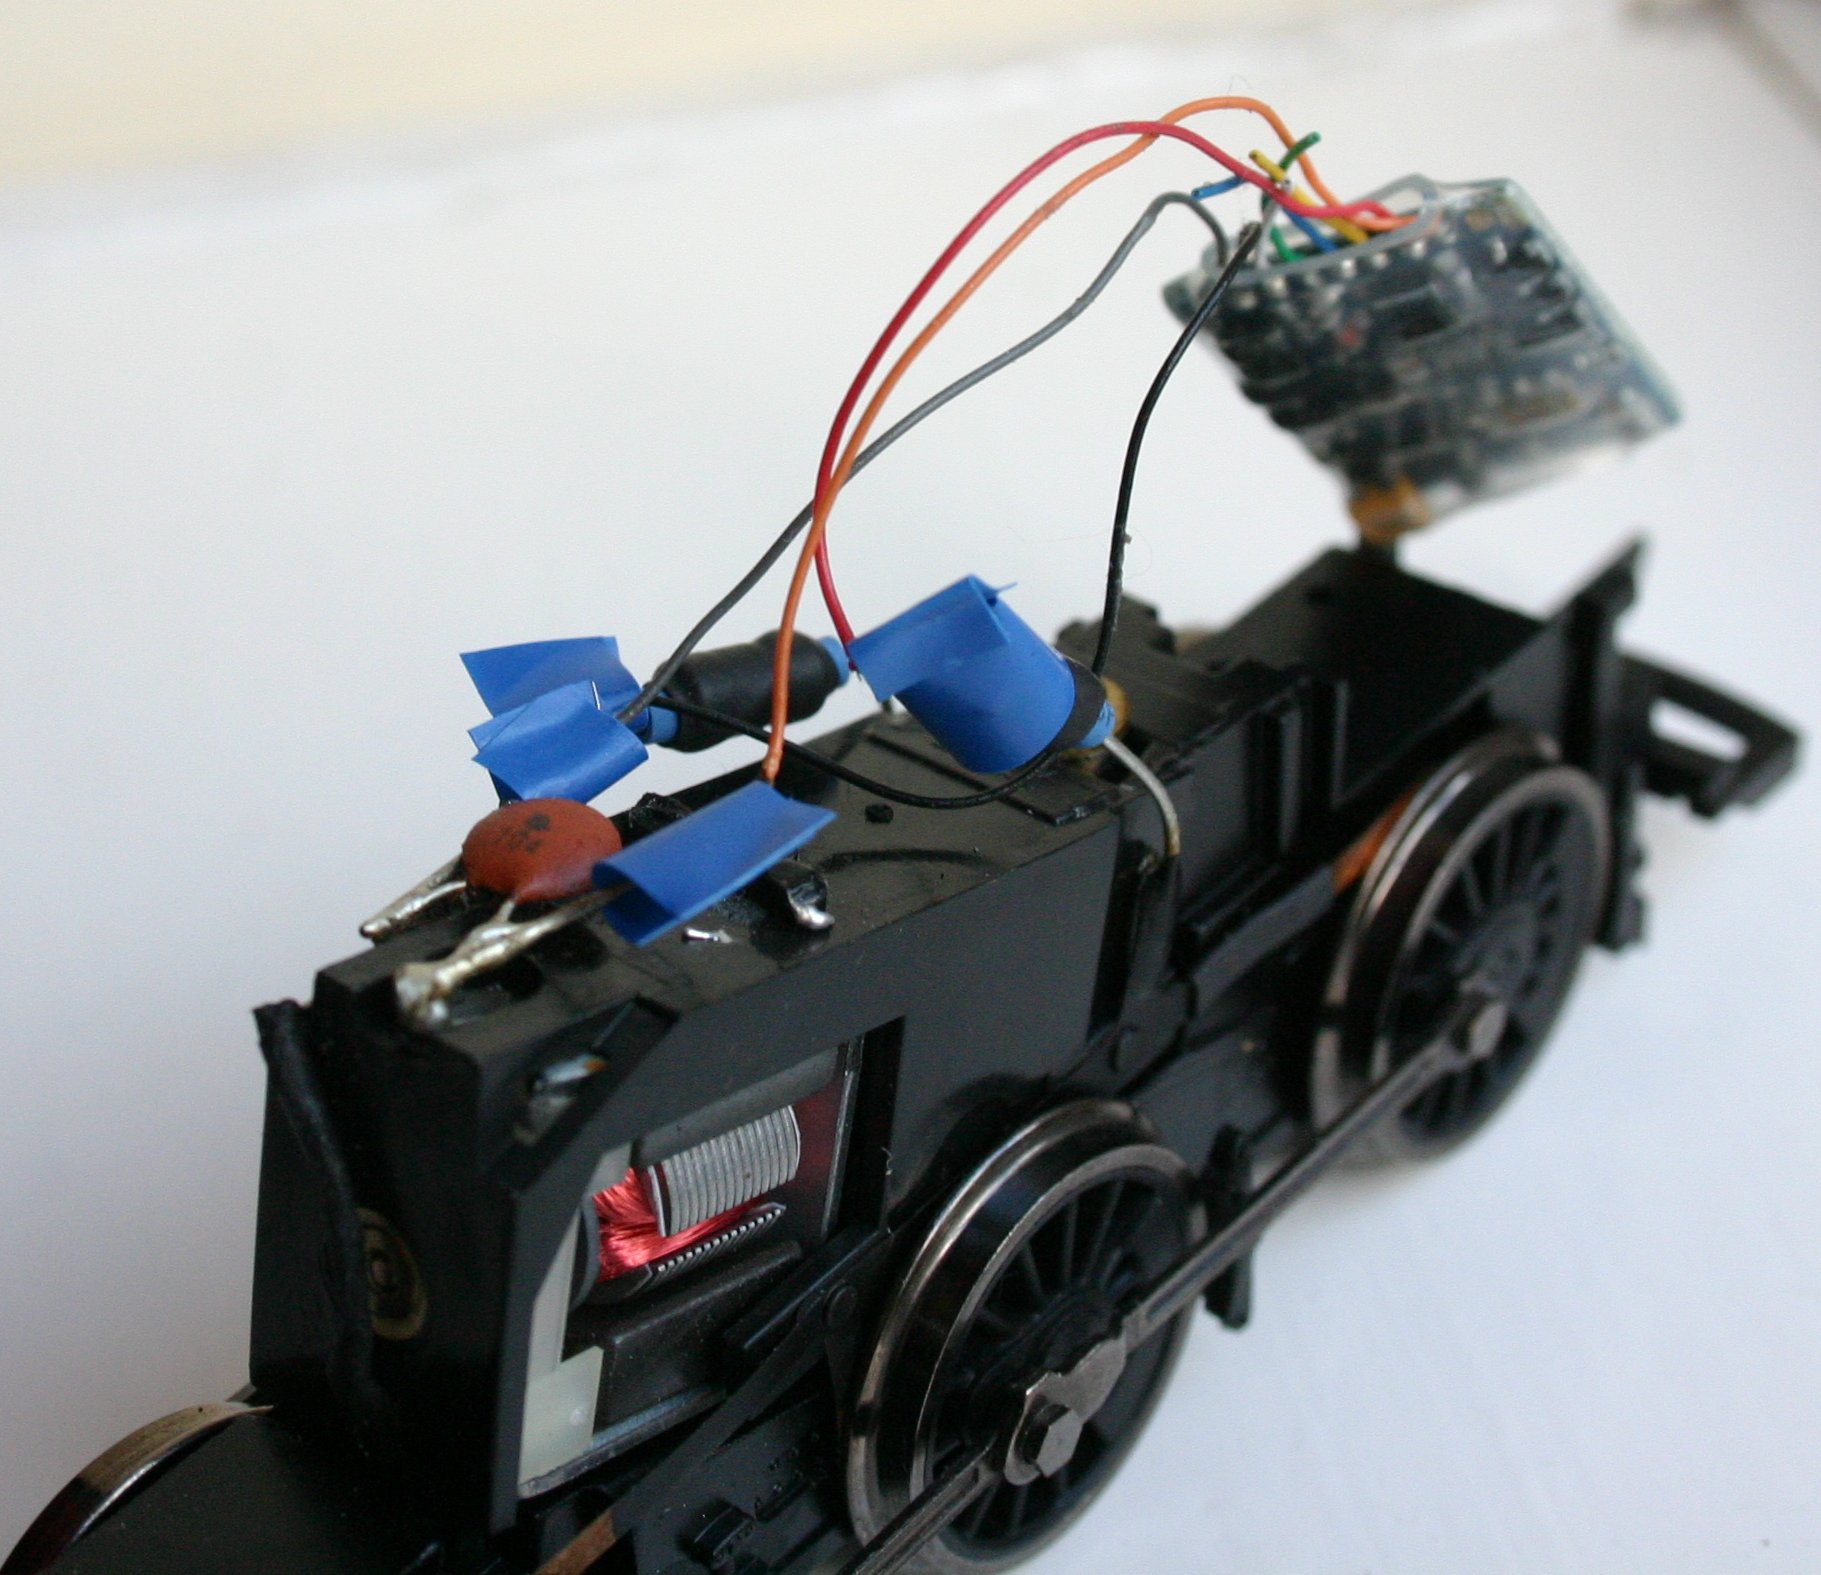 Connect and solder the wires in the direction of where you wish to put the decoder, which will almost always be towards the front, as with this. After soldering, pull the cables to check they are secure and then wrap with isolating tape to prevent short circuits. Note that if using the chassis in a Hornby Jinty, space above the motor is tight, so you will need to install the wires close to the motor. Test the chassis on DCC track and if it works re-fit the body and you are done! This chassis was taken from a Hornby Jinty, was then fitted to a 2721 Pannier tank and is now fitted (permanently now!) to Locoyard’s uniquely super-detailed LBSCR E2 tank engine 100.

thanks for the help
LikeLike
Excellent guide. I’m just embarking on my first decoder hard wiring and this guide has given me the confidence to go ahead!
LikeLike
I’m very happy that you’ve found the guide was useful. I hope it goes well! All the best, Dave
LikeLike
Thanks Dave. Just completed it! I fitted a digitrax decoder from coastal dcc. A bit scary, but the engine runs fantastically. Many thanks.
LikeLike
Congratulations! I remember my first time hard-wiring a DCC chip – it was scary as you say, but well worth it! I’m very happy that all went well.
Cheers,
Dave
LikeLike